
The ceilings are finally done in our big mess of a basement. Feast your eyes on this gorgeous span of white.
.JPG)
Okay, admittedly the amount of work required to scrape and refinish the ceilings doesn't begin to pay off with the after photos. In fact, if we did them right, no one will ever notice them. But I will know my friends, and in those moments I will remember how much work they were, and wonder why we bothered. I mean I'll be proud. I'm only partially kidding.
But moving on, because that's all I can do, next it was time to take care of that big fire burning monstrosity.
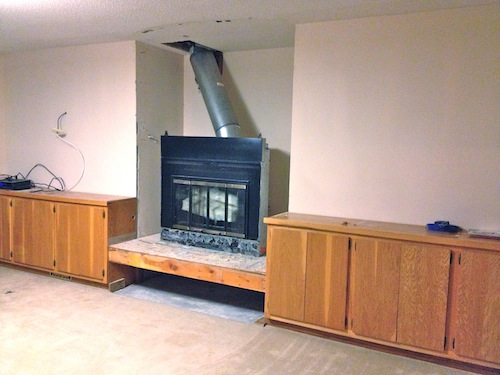
After weeks of shopping, the Hubs and I finally found the best deal on a fireplace we were both happy with. Rather than placing an insert into this old beast, we decided to go with a brand new one, because with us doing the demo and the rebuilding, the price was basically the same. That meant the Hubs got to do a little more demo. Adios Old Smokey.

With everything out of the way, it was up to me to figure out where the new fireplace would go. I consulted the rough opening instructions on our brochure, and after about 6 cups of coffee one Saturday morning came up with this.

I had to account for the height, width and depth of the wall to accurately fit the opening and our fireplace, while also making sure the fireplace was at the exact height on the wall that we wanted, and structurally supported with a header beam. After I was done, I calculated exactly how much wood of the various lengths and thicknesses I would need. I had about 30% confidence at this point that I had done it right, but we strapped the kiddos into the car (two cars actually so the kiddos didn't have to ride home with a bunch of 2x4s) and headed to the Home Depot.
Later that afternoon when the kiddos went down for a nap, Hubs and I got our build on.

After hours trying to wrestle with braking masonry bits trying to attach the frame to the concrete floor, we finally called in the big guns, and headed back to Home Depot to invest in a concrete nail gun. This .22 caliber tool uses what is basically a bullet in a chamber to force the nail into the concrete. It went boom, and it was magical.

When we were done we had this glorious, and surprisingly level, creation.

But the real test is when our fireplace installers came over to introduce our new best friend to the family. Just a slight mistake in my calculations would mean that the fireplace couldn't fit in our wall, and we'd have to tear apart everything and rebuild before it could go in. I was out with the boys when the installers showed up, and when I returned, there was this.

Success!! I asked the installers how the unit fit and he responded, I kid you not, "Like a glove." (PS- I just read that out loud and realized that I said "the unit fit like a glove", but I'm not going to change it. It was an honest, and awesome mistake.) Let's just celebrate the fact that somehow I magically planned and built this wall exactly to the specifications. Miracles do happen.
The next step was to cover our little wall with Durock, a strong surface that will hold our mortar and stone.

Before too long we had this.

It's not much to look at right now, but try to imagine it covered floor to ceiling in this beautiful stone.

Not feelin' it yet? Then perhaps you need to take a look at these sexy little flames.

Is that beautiful or what? This guy already provides so much needed heat to that cold, basement room, we couldn't be happier. There's still so much to do down in this room, and we've committed to taking it slow so that we don't feel too over worked, but I'd say it's coming along nicely so far. Has anyone else installed a fireplace before? I've got to be honest, this is such a different experience than I expected when we started, when I was expecting that we were working with a traditional masonry chimney. It's strange to me that my fire box is basically supported on big wood sticks, but that's progress for you folks. I can't wait to show you guys what's next.
No comments:
Post a Comment