So yesterday we left off the Playroom/Hallway wood floor extravaganza with all the flooring in, but definitely not finished. After 8 hours of floor laying, the Hubs and I were dead tired, so instead of working to finish up the molding, or even taking a photo, we decided to get out of the house and go have diner somewhere as a family. It was a much needed break, and a good thing, because we didn't realize how much work the molding would be.
Turns out the previous molding was painted after the carpet was already installed, so on most pieces the bottom 1/2" was still stained wood from where the molding was tucked behind the carpet. The paint was thick and globby, and there was even carpet still stuck to the paint in places. Hot. Mess.
We breifly considered buying all new molding, but that would come with it's share of challenges too. We'd still have to paint all the molding, and we'd also have to spend hours cutting all the precise angles and joints. Not to mention the $200-300 we'd have to spend. Our cheap side won out, and we got to work.
Step 1: Remove all the nails from the molding. Not as easy as it sounds, as you don't want to damage the wood on the way out. We found that pounding the nail back through from the back side helped, along with some needle nose pliers to pull the long, skinny nails out.
Step 2: Sand 'em babies. We used 60 grit and a hand sanding block to remove as much of the thick and chunky paint as we could. I also used a scraper along the ridge where the paint stopped and the wood was exposed, because there was often a thick line of paint there. We didn't remove all the paint, but we got it all down to a thin and even finish that we could cover over.
Step 3: Prime. I made sure to wipe down all my boards first with a wet rag to remove all the dust and paint debris, and then used a brush to apply a thin coat of primer to all the boards. This coat doesn't cover up everything, but that's ok, it's only meant to give you a surface that your paint will adhere easy to.
 |
| See how the coverage isn't that great? Don't be alarmed. |
Step 4: Paint the molding. Twice. I did two coats of thin and even decorator white trim and door paint, which I applied with a nice clean brush. I've used foam or regular rollers for trim before and have always regretted it. I find thin coats with a brush give you the most even finish, hands down.
All in Day 2's Trim Extravaganza took me 5 hours, although there was a little dry time in there. Yes, it took nearly as long to paint this trim as it did to lay wood floors in our Loft. Maddening I tell you, but in the end it looks fantastic. I didn't have to do any measuring, just returned all the pieces to their prelableed places. (Because we're smart like that. Or at least we were... this time.)
And... ta-dah!
 |
| Eventually I plan to build a table under the window where the bean bag chair is. |
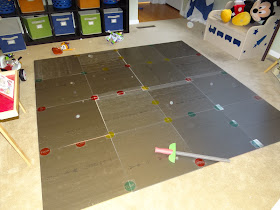
My favorite part is how our Flor rug now lays in the room. I don't think I ever mentioned it to you all, but Flor rugs are NOT intended to be laid on top of carpet. I found that out the hard way, as the corners were always popping and unhooking from each other. I even tried to flip it over and duct tape all the seams once, but it was just an ugly mess. Case in point:
 |
| Not bad... |
 |
| Yeah. Not so much. |
Now they look flat and fantastic though.
While I was at it with the painting and priming, I painted a couple of shelf ledges my parents had left over and gave me to hold & display some of Ryder's new "Big Boy" books.
 |
| Before |
I didn't get rid of the homemade art that I used to have in this section, I just moved it over to the other side of the room.
The Guest Bedroom:
And into the Kiddo's rooms:
There's that orangy laminate "wood" flooring that's in both of the kid's bedrooms. It didn't bother me before, but of course now next to our beautiful real maple floors its driving me insane. Oh well, one project at a time, right? I used to get frustrated when I said that, but I'm actually thrilled with how much we've been able to check off The List in our first 14 months here. We've been up to a bunch of other stuff too that I can't wait to show you. This nesting thing is really kicking our house into gear!


The playroom looks great and the molding looks sharp. it's all so clean looking. thanks for the pictures!
ReplyDeleteBoy, that's a lot of trim. You're a better woman than I!
ReplyDeletePlayroom looks like it came straight out of a magazine. Great job! And good thing the Flor tiles are working out now. I hadn't heard that about Flor over carpet, but I'll have to keep it in mind!
Erin @ The Great Indoors