Showing posts with label Bungalow. Show all posts

April 25, 2011

Good Bye Bungalow

While I've been constantly trying to remind myself in the last few weeks that we are moving into an incredible new place, I can't help my weepy heart from getting all sentimental about leaving The Bungalow.  This is really the place where our lives together, and our family began.  As each room started getting cleared up and packed away, all of the memories came flooding back.


Like this empty space, which has come full circle and is empty again now, where 6 years ago my hubby proposed.  We were in contract on the house, but hadn't closed yet, and we drove by to look at the home.  Jason suggested we get out and peak in the windows (we knew it was vacant), and I jumped at the chance.  From the side of the house I heard him say, "Hey, the door is open..." and I raced over to him yelling, "Don't go in there, it's breaking and entering!"   But when I raced in the house after him, I found him on one knee in the middle of the Dining Room, ring in hand.  He said something to the effect of, "Since this is where we will begin our lives together, there's no better place..." and I mumbled something like, "Oh my gawd yes."  We ran around the house for a little while afterward planning what we would do with each room, before a limo came by to pick us up and drove us around the lakes while we called our parents, and then took us to dinner.  I mean just try to say no to that.  Impossible.

Or the garage we built together the summer before we got married, (with the amazing help of my foreman Father), which started our fire for home improvement.  
Jason running the bobcat to tear down the old garage.  (Yes that is a beer in his hand, but I swear we were done for the day and celebrating, we do not advocate drinking while running a bobcat.)
Jay and I attaching the Roofing (Don't mock the outfit, it was literally 104 degrees in July, and we were working on the roof!  Jason was only wearing a shirt to protect his baby white skin.)

Erin hauling 4x8 sheets of plywood to the roof to install.  Somehow I got the job of hauling, while Jason and my Dad waited on the roof for me to bring the pieces- how did that happen?
And then there are the funny memories of how we began, like the first 4 years when we had barely any window treatments in our Living Room and lived like we were in a fish bowl.  Or our basement when we didn't have a lot of furniture yet, or sense of style...  It may have looked like this for the first year we lived there.  I can't believe I just admitted that.


And our amazing tree that perfectly bent over the back deck to provide privacy and shade.  Although cleaning up after it was a chore, there is no denying the beauty of it's changing throughout the seasons:

My heart is breaking a little as I write this post, but I know we have years of memories ahead of us in our new forever home.  Even though we'll always remember The Bungalow as our first place, to our kids, The Lodge will be the only home they'll really ever know.  Hopefully it will provide years of great memories and family gatherings as they grow, and be the quiet retreat they like to come back to as college students and adults.  But before we take this next big step, we'll take one last moment to say, 

Goodbye Bungalow.

PS- Special thanks to our amazing family that helped us empty the house into the truck, and to my fabulous sister-in-law for taking this photo!

April 15, 2011

El Patio- Spanish for "The Patio"

The title of this post comes straight from one of my favorite college t-shirts.  Ah, college... those were the days. 

But enough tequila drinking nonsense... I was going through and organizing some photos, and realized that I had a lot of before, during and after photos on our patio paver walkway project that we did in the first house.  I don't have photos from every step, but if you all like a good before-and-after as much as I do, (and who doesn't, right?) I thought these would be worth sharing.  

So in a few simple but dirrty steps, (that second r's for you Christina Aguilera) here is how you install a patio paver walkway.

Step 1- Draw out your desired walkway with spray paint on the grass.  We wanted ours to be 3 feet wide, and have a nice gentle curve to the garage.


Step 2- Clear the space. In our case, we had to remove the old walkway, which was pretty easy with a chisel and hammer. (And my Hubby's big guns.)  Even Ryder helped. You may need to break up your old patio with a sledge hammer first, and then dig up all the pieces.

Step 3- Dig out your area 7-9" deep, and an additional 6" wider on each edge.   That will make room for about 4 inches of gravel or "Class 5", plus the height of your block so that your bricks are flush with the ground. The additional 6" on each side is to account for the edging that helps keep your blocks in a nice clean edge. (Especially important for a curved border.)

Step 4- Level and Tamp your area.  Make sure that your area is slopped just slightly so that rain will run off the edge, not pool anywhere in the center of your patio.  Once level, you can either use a hand tamper to firm up the ground or for very large spaces you can rent a large machine tamper.  Which we didn't do, but should have, but we're gluttons for punishment like that.

Step 5- Fill with your gravel or Class 5.  Freeze and thaw cycles can expand and change the layout of the ground over time, so if you fill your space with gravel or Class 5 the ground will be more steady and you'll have less risk of your bricks sinking and becoming uneven.  Ask your local Home Improvement store which material is best for you in your area.  Class 5 is recommended in Minnesota with our extreme winters.

Step 6- Stake in your edging.  I didn't take a picture of this step, but our friends at DIY Network always have great tutorials and supplied this picture in this tutorial. 

Notice that they are installing with the stakes to the outside of the patio.  This is important to ensure your bricks are level.  Full disclosure, we did this wrong at first and then had to go back and redo everything.  Which was not awesome.  One of us might have had a temper tantrum.  Any guesses?
Step 7- Decide on your pattern and start to fill in your blocks.  As you can see in our photo below, we wanted a border along the edges, and then filled with a herringbone pattern.  Not the easiest pattern that we could have chosen on our skinny curved walkway.  In retrospect, not sure what we were thinking.

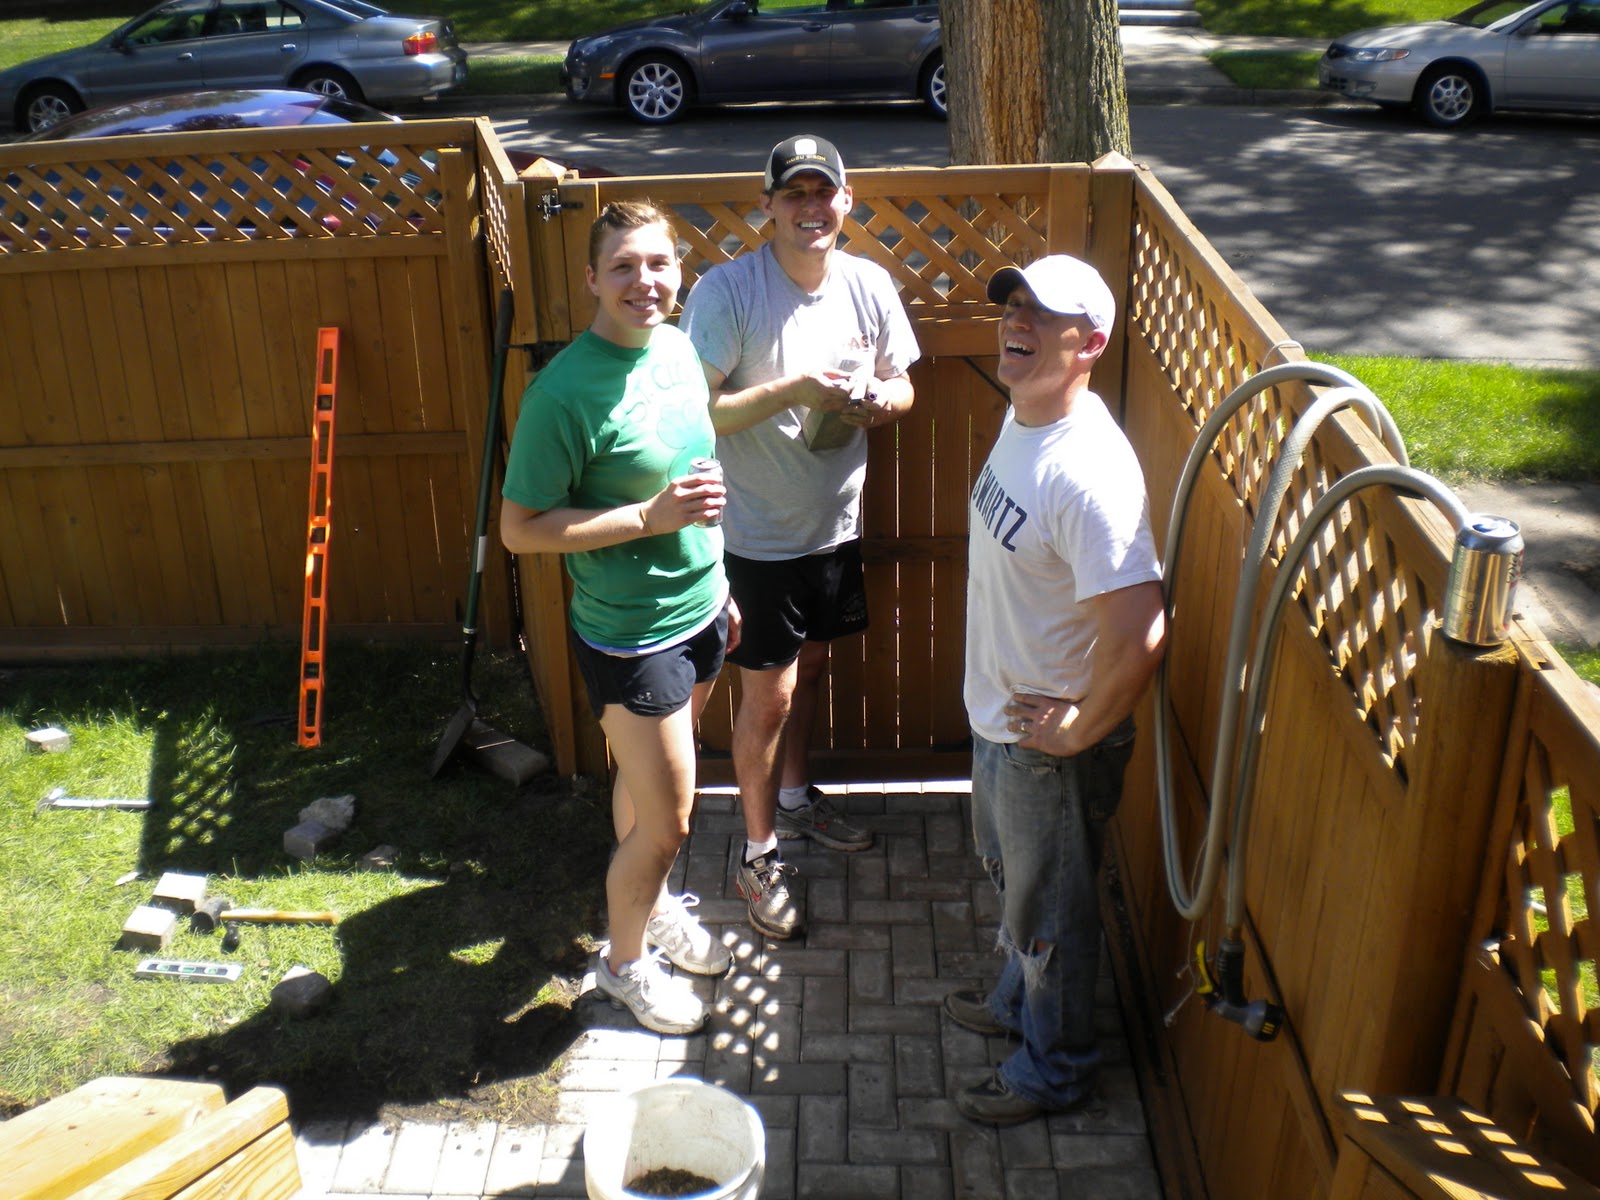
Since we had some incredible help from our friends Morgan and Noel, we broke up into teams and 2 of us laid out the pattern while the second team followed by marking the cuts we would need on the blocks to fill the other spaces.  

Step 8- Cut your blocks with a wet saw to fill in the pattern.  Make sure not to work too far ahead, or the pattern will start to get off.  We ended up adjusting the pattern quite a bit as we made our way down the line.
Our great friend Noel cutting the bricks on the wet saw as Ryder sits on the safe side of the yard he was allowed to play in and tells the rest of us to "Get to work!"


Gratuitous shot of Ryder taking a break in the shade after a long afternoon of working.

Step 9- Once all your bricks are in, fill in the cracks by sweeping the space with patio sand.  (We recommend the weed preventive version so that you're not pulling weeds from your bricks every year.


Step 10-  Remove the efflorescence. Efflorescence is often found on new pavers, and is white and chalky, causing a discoloration. Efflorescence usually goes away 6-12 months after the pavers have been installed. In our case, it made the patio look a blueish-gray, instead of the "sierra tan" and red tones we had intended, so we sped up the process by using a muriatic acid solution to remove the efflorescence. You can purchase it at most home improvements stores, and you simply scrub it on with a brush, and then rinse it off.  If you choose to wait and let it go away naturally, DO NOT seal your patio until it is gone.  Once sealed, the efflorescence cannot be removed unless the sealant is striped off.

View once the efflorescence was removed and bricks had a much more tan/red hue to them
Step 11- Seal your patio to avoid any further discoloration of the bricks or weeds in the cracks.

A big shout-out to Morgan & Noel for all their incredibly hard work.  We owe you guys a home improvement... or two.


April 13, 2011

Bathroom Emergency


Lucky for you this post is not about #1 or #2, as a rule there are some things we won't over share here on the Blog.  Although Ryder hasn't gotten that memo yet, considering he recently told the entire dinning hall at the Pancake House how giant his poopy was.  Thank God he's cute so they didn't kick us out.  True story.

Nope, this one is about our emergency bathroom remodel which had to be completed in less than 2 weeks.  But Iet's start at the beginning.  When we moved into our first home, one of the very first changes we made was turning the bathtub in our Main Bath into a shower.  
Main bath the day we moved in- no shower


Since we were young and poor, and brand new to DIY, we did it the easy way, with external shower plumbing and a 360 degree shower curtain.  It wasn't perfect, but it did the trick.  It sort of felt like showering in a plastic baggie...


That is at least until it was time to sell the house, and a tour of some of the comps in our neighborhood showed that we'd really need to step up the game of this main bath if we wanted to swim with the big fish. 

So while we waited for the refinance on our house to close (see that story here) we got to work on a bathroom remodel.  We enthusiastically tore down plaster, ripped out the tub and scraped up the floors.  After the dust had settled from the hammer and crow bar swinging, we realized that we had pulled a "Crazy Astronaut Lady that Drove to Florida in a Diaper to Attack Her Boyfriend's Girlfriend," which is to say we made the biggest mistake of our lives. 

In order to refinance our house we first needed to get an appraisal.  And not just any appraisal, but one that would say our house had increased in value by more than $40,000! With the new garage, kitchen and countless other projects we had done we weren't previously worried about getting the increase, but now that our main potty was hanging out in the hallway, things weren't looking too hot.

With just 3 weeks until the refinance closing, we spoke with our mortgage broker who told us that he would need a final appraisal no later than 1 week prior to the closing to get the paper work finished on time.  That gave us 2 weeks to get our bathroom from scrap heap to gorgeous.  Since Hubby and I both worked full time those weeks, in addition to being full time parents of a full time party animal, the next two weeks were absolute chaos.  We stayed up until 4AM one night trying to get the 800 lb cast iron tub out of the bathroom.  I was up until 2AM trying to install a glass block window, (because I didn't realize until it was too late that once I took out the old window I couldn't safely go to bed with a huge hole in the side of our house.)  We slept 3 hours a night.  We ate take-out for 2 weeks straight. We smelled bad all the time. The process looked a little like this:


And then finally like this:


In the end we were thrilled with the final product, and were actually glad that it was over so quickly.  Although we definitely plan to spend a little more time on our 3 future bathroom remodels.  You know, so we have time to do the basics like shower before work and apply deodorant.  (Sorry co-workers.)

Anybody else have an embarrassing home improvement story to share?  Come on, anybody? Nobody else destroyed their home and then remembered the needed to get a home inspection?  Really?  Lie to a girl then, will ya?