
Helloooo Counters!


And then... countertops. Goregous new countertops.

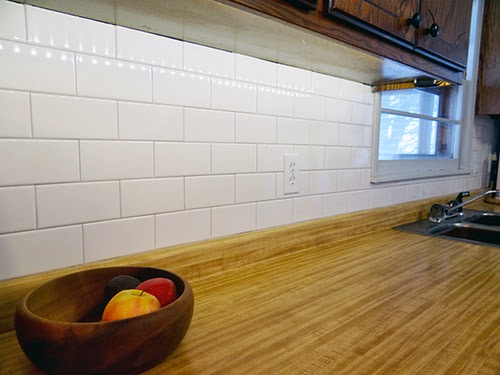
We chose a Silestone quartz counter (Helix) that looks like carrara marble, as we loved the look of marble but not the cost and upkeep. It's everything I had hoped for. It's light and brightens up the room. The veins in the stone give it more of a vintage feel than a solid white counter would have.

Of course right about now you're noticing my big problem. If you recall, back when we installed the back splash, the plan was to live with the old counters for awhile, which included the back lip. Now that we've changed our minds, the ugly green wall behind it is exposed. Now I could have just ordered a back lip on this counter, but I just don't love the way that looks. I'm stubborn and I chose to do it the hard way.


Back when I installed the tile I noted that the lip of the existing counters was the same height as a piece of my subway tile, so adding in another course would be a piece of cake. In reality I was an 1/8" off, which means I had to shave a tiny bit off of each and every tile. Not impossible, but not a piece of cake either.


Of course this is not the ideal installation method, and you should always build your back splash from the counter up if you can. Getting these to be perfectly level and straight was little tricky and a bit tedious.

Sometimes my 1/8" spacers were too big, but I found that table knife blades, and a pencil tip, provided the perfect height. Use what works!

On the Orangesicle Dream side, the missing row was the exact height of a tile, so that one was a breeze.

Back in the "Use What Works" category, I used push pins under my tiles in the open oven area to hold them up and fight gravity while the mortar dried.


And it was glorious!

My new grout lines aren't entirely dry yet in these photos, so they are still slightly darker than the surrounding grout. I had to get these shots for you before I left for the weekend, but trust me, they will all match soon enough.


I can't decide what I love more, the counters or this amazing new farmhouse sink! I have a whole post coming your way about the install on this big fella.

Which is so much better than this shallow, off center and banged up one we started with.

Speaking of progress- how about a little before:

And after:

So... what do you think? How did we do?
It looks amazing!! I really like the way the new counters and backsplash look with the wood cabinets, such an awesome update. The new sink and faucet are super nice too!
ReplyDeleteLove it! I wanna see a pic where the half circle hanging into the walkway isn't there any more!
ReplyDeleteGreat breakdown! I’ve worked with Full-Service Countertop Contractors and had a fantastic experience.
ReplyDelete