
It's kitchen time! You may remember that we are working off this gorgeous inspiration image for our cabin kitchen. Dark wood cabinets, rustic wood floors, white subway tile back splash, white stone counters and a vintage apron front sink. I love everything about it.

Making our kitchen look like this won't be easy, but we'll just take it one step at a time. Today's step: the back splash. Yes, typically you would (and should) replace your counters before installing a back splash, but we're rebels like that. Actually, we're prioritizing our budget and saving up for beautiful new stone counter tops, and can't possibly wait another second to cover up this orange nightmare.

But, lucky for us that the back piece of our current laminate, wood-looking, counters is 3 1/8", the exact height we would need to install another row of 3" high subway tile. So down the road when we take out this counter and put in our new one, it should be easy to fill in the gap. Fab-u-loussss!
Before we could get our hands on those glossy little tiles though, we had to do a little work to both sides of the room. On the stove side, as you can see in the photo above, we have fake wood paneling coming up from behind the counter. I started with my Dremel Multi-Max (favorite does-everything tool) and carefully cut the paneling just above the counter.
 |
| How awesome is that wallpaper? I SO wish I had photos of this room from the 70s. |

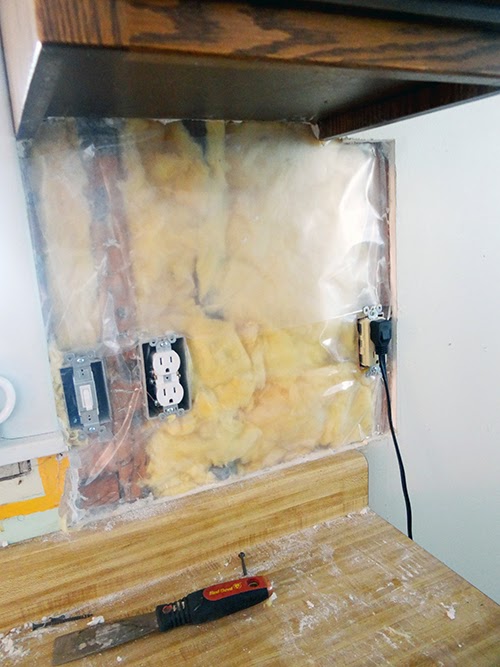
While the stove was out, the Hubs took the opportunity to remove that Coppertone eyesore of a vent
hood. Smell ya later.

Viola! The stove side is ready for tile.


We choose to hang Durock over here instead of Sheetrock, since we'll be tiling over it. In theory, since this tile will see very little if any moisture, Sheetrock would be just fine (and we're leaving it on the other side of the kitchen), but since we're starting from scratch here anyway, we chose Durock which we happened to have extra on hand, and it gives the tile a little more to grip to The Hubs was in charge of cutting the Durock, but I stopped over and measured for the outlet holes for him, which is usually my least favorite part. But look at this: right on the money.

We didn't bother to pull out the piece of Sheetrock right under the window, but lucky for us is was flush and even with our new piece and you'll never know. Score one for lazy DIYers.

So there we go. Lights are in. Wood paneling is out. The walls are ready and just begging for some tile. We're making tons of progress up there, I can't wait to show you what's next.
You guys make me feel lazy. Cabin is looking good! Miss your family.
ReplyDeleteThis comment has been removed by the author.
ReplyDeleteAfter reading your post I am amazed and request you to please also provide a detailed article about ideas for kitchen island with seating
ReplyDelete