Showing posts with label Foyer. Show all posts

July 12, 2012

#3- Part 3- Covering the Floating Steps


Its steps time baby.  As I mentioned earlier this week, after a couple of tried and failed attempts, we finally have a plan that we think will work.  It's a little complicated, and it's also not very likely that others will have our same exact situation, so I won't bore you with too many details, just the fun stuff.  Yes, rebuilding steps is totally my idea of a good time.  I'm letting my freak flag fly. 

First we got our wood.  We decided to go with a light maple that will match our new wood floors, making all the various spaces and levels feel cohesive.  We actually like how the light maple and Golden Pecan stained oak go together in the Living Room, Foyer and Loft, giving it a duo-tone look that appears slightly more modern. (Plus, I just couldn't get myself to stain anything new in the house golden pecan.)  I ended up going to 3 different lumber yards on an endless trek for maple, but here's what we found:


1.  3/4 inch plywood with maple veneer for the stair risers.  (I wanted to use solid boards for this, but 1 x 10 maple boards were going to break the bank, so we'll take the time to cut down our plywood and apply veneer to the raw edges.)

2. 1/4 inch plywood with maple veneer to the stair treads. (The part you step on.)

3. Ranch style maple molding for the edges.

It will make more sense in a second.  Here's a section of my big ugly stairs now:


 First we cut down the 3/4" plywood to the width of the step, and the height from the bottom (underneath) of one step to the bottom of the other, plus 1/4".  (I'll explain the 1/4" in a second.)  In theory this should be easy, but every single one of our 19 steps is a different width and height, so I was the crazy Type A one with my measuring tape, graph paper and insane lists.  When you cut plywood you get a exposed/raw edge that is not very attractive, like this:


So for each riser we have to iron on a veneer strip to the exposed bottom edge, which makes it look like this:

The bottom riser has a veneer applied, the top does not.

Hubs maned the ladder underneath the set of steps (did he ever), and placed the stair riser in place, using a small level to make sure it was perfectly vertical.


 Once set, I went to work with 3 different drills.  One 1/4" bit to bore a shallow hole in the step that the screw would fit into to make it flush, one tiny bit to create a pilot hole so that the board didn't crack, and finally one to drill in a 2 1/2" wood screw.

My screw nested in the face of the step, completely hidden.

Then the hubs used finishing nails on the nail gun to tack in the bottom of the riser to the stair from underneath.  Hubs stands on the dangerous ladders, I make the babies.  We all have our roles. 


Once they are all in, it looks like this:


Next step, we cut the 1/4" plywood to the exact width and depth of the stair tops.  Again, this insane house did us no favors, every step = different size.  We used Loctite Sub Floor Adhesive and finishing nails on our nail gun.  Starting to look better...


A little finishing touch with the molding is the icing on the cake.  You'd never know there were ugly floating stairs under here:


Unless you were looking from the floor below that is.  

The flash kept coming on in these pics, making the trim look much more orange than it is in real life.

Nothing that a little more 1/4" plywood can't fix.  Remember when I said we cut these risers 1/4" longer?  That's so that we could fit a piece of plywood, in the quarter inch thickness underneath the step, and the riser caps off the raw edge perfectly, creating a flush corner.  It's the type of thing I come up with when I'm laying awake at night planning every detail of a project.  I can't shut it off.  It's a sickness.

We're waiting to put on the bottom riser until we have a finishing piece for the floor.  More on that later.


It's not going quickly, but we're getting through about a section each night after work when the kiddo goes to bed.  After all the wood is on we'll still have a bunch of work to do with wood putty and sanding, and then the fun worst part- polyurethane. Since you basically can't get to any room of the house from another without using the steps, we're going to have to get creative about the poly, but let's jump off that bridge when we get to it.  I'm just going to take a few deep breaths and appreciate the progress. 


Ahhhh.....

July 10, 2012

The Dreaded Steps Return

From the very first moment we stepped foot into this house, we knew that one project would be the death of us... the steps.


There are 8 half flights of steps in our house, all that run in a square pattern through the center of our house. 
Photo taken from the top during our Loft painting project.
While the floating steps might have been as cool as Members Only jackets in the 80's, they aren't exactly family friendly.  The previous home owners solved the problem by wrapping them in Ikea floor mats and chicken wire.  Genius.


And we loved that chicken wire, really we did, but the pet hair and food particles left over in that wire was enough to drive the Hubs to drink.  We weren't in the house very long before he ignored my frequent requests to leave it until we had a plan, and made the executive desicion to remove it.


That's where things went very badly.  Unfortunately, the solution to replace the chicken wire wasn't quite so easy.  The Hubs spent thousands of angry, cursing hours trying to sand the steps down to the original wood,


 and re-stain them,

While I cut and stained wood risers to  install across the backs.


And in the end it looked... well, better.


But the reality was that the stained treads and new risers never looked like the same color no matter what we did.  The steps out of the foyer weren't bad, but the ones leading up to the Loft and Master Bedroom -- Hot. Mess.


We never even bothered to poly and finish them, because we just weren't happy with the look.  Instead we did the perfectly rational thing, ignored the fact that they looked terrible and moved onto other projects on The List.  A year later, those steps are coming back to haunt.  The rest of the house is coming together, and we really can't leave this project in progress just lurking in the center of our home anymore.  The breaking point was when a stranger came to the house to buy something off Craigslist from us, and immediately upon entering pointed to the steps and said, "Looks like somebody has a project..."  Yeah thanks buddy, just give us the cash and take the big ugly piece of furniture.  Thankyouverymuch.

So all that's to say, it's steps time.  We have a plan (that's going to actually work this time), and although it might take awhile, we're not going to quit until we get it done this time.  And just in case we need any more motivation, the little kick boxer in my belly reminds me every day that there's no way we'll have time to build wood steps with an infant in the house, much less have the ability to stain and poly (and therefore not be able to use) the main walking space in our house.  I'll be back this week with the update, because even though this before and after was better...


It's just not good enough.  Wish me luck!

December 1, 2011

Installing a Digital Light Timer


If you happened to catch yesterday's  Wordless Wednesday post, you know that things we're going well for us.  But today's post is really all about how your home's electrical isn't really as scary or complicated as it looks.  Stick with me, we're getting there.


We had purchased a digital timer for our exterior lights back in this post, and I was finally getting around to installing it.  We installed one of these timers on our front light back in The Bungalow, and I loved the convenience and security of always having the lights on when you return home from work, with the money saving feature of having the light go off automatically.  Our new home sports 3 exterior lights over each of the garage stalls, which looks really cool, but unfortunately we can’t see them from the front door.  Coupled with a 3 way switch, we could never tell if these lights were on or off, which caused us to waste a lot of electricity.  The timer also has a pretty fancy feature where you plug in your zone and time, and the lights can automatically adjust to go on at dusk and off at dawn through out the year.  And you know how we love being fancy.


So the plan was to swap out for the new switch, and because I can’t help but take on accidental projects, while I was at it, I was going to replace the other two almond color switches for white ones.   Seriously though, our house is full of mismatched switches, outlets and plates.  It’s enough to give this Type A blogger a nervous tick.


First things first, shut off the power.  It took about a dozen trips up and down 3 half flights of stairs before I discovered the 2 separate circuits that needed to be turned off. Seriously, nothing can ever be easy. I was about 15 minutes in and sweaty before I had even picked up a tool.  I’m turning you on now aren’t I?  Sorry about that.  Once the plate was off I double checked that all the circuits were out with my handy little tester.  These babies cost around $10-15, and are worth every penny.  Point at the wire, and if it’s hot the tester will light up and beep at you.  This is how I discovered there was a second circuit lurking in here and trying to kill me.  Smart huh?


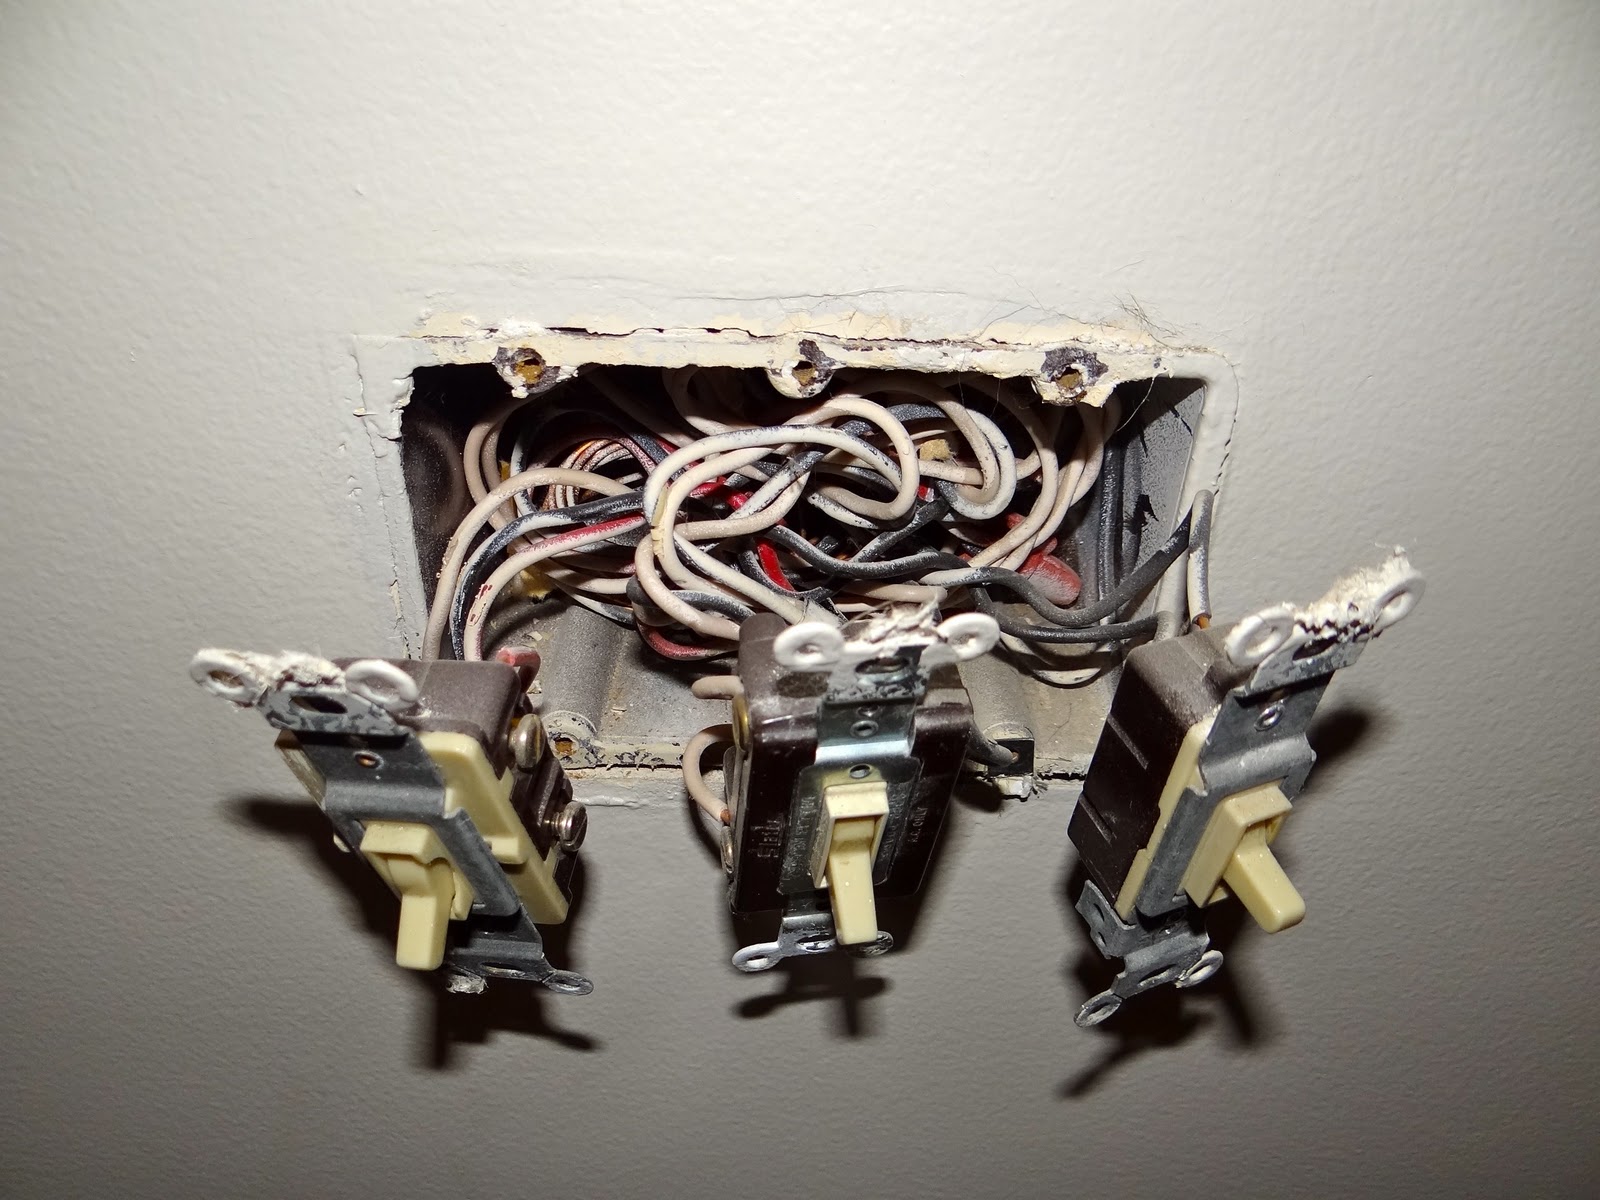
Then I removed all the screws holding in my switches, and pulled them out to see what I was dealing with.  There was a mess of 8 different wires in this bad boy, connecting one 4-way switch and two 3-way switches.  Luckily for me I had enough left over switches in my electrical bucket (whenever I’ve made a switch to put in a dimmer for example, I always save the switch I remove) and I happened to have both a 4-way and a 3-way switch in white.  Sweetness.


Basically there are two different ways to connect your wires to the terminal on the switch, you can wrap your wire around the screws on the sides, or place the wire in the holes in the back of the switch. 


The second way is much easier for install, as the wires go in easily, but to remove them you have to press a small screwdriver in to a button on the back.  It’s sort of complicated to push in with the screw driver while pulling out on the wire, but not rocket science. 


All I did was take the wires off the almond switches, and attached them to the new white switches in the exact same way.   Simple.  Until it was time to take on the timer.  Back in the Bungalow our front light was just on one switch, so it was a quick, five minute swap.  But like everything in this big, beautiful foreclosure of ours, nothing is ever easy.  The garage lights are on a 3-way switch, which meant working with all 5 different colored wires on our timer (Black, White, Red, Green and Blue), and making changes to both the switches in our front entry and in the garage.  Then the helpful diagram that came with the timer showed “the most common” 3-way switch wiring, which over course looked nothing like our set up.  And to make things even more complicated, our 3-way wiring was done backwards, so what is usually the Red wire was the Black, and the Black was the Red, which took me a few (read: 30) minutes to figure out.  I had every wire pulled out of the switch box just trying to figure out my mess, which is when I took a break to post my photo for you all.

Then it was time to find my sanity.  That is- my books.


The one on the left is the DIY bible my dad used to build the house I grew up in 25 years ago, and the one on the right is my bible we purchased just after purchasing our first home.  If you own a home and don’t have one of these books, go to the store right now, it’s worth it’s weight in gold.  While my book is much newer with cleaner photos, timelines and skill levels of each task:


I hang onto my Dad’s because it has some really helpful diagrams, especially for electrical.


So it was here that I could sit down and reevaluate my situation.  Electrical is really all about what we learned in third grade science, completing the circuit.  Basically from a light is a line that goes down to the switch, and then back from the switch up to the light.  Flip it “on”, and you leave the circuit on, it lights up.  Flipping it “off” closes the circuit, and your light goes off.  It gets a little more complicated, but the concept stays the same.  Books like mine and the internet can provide you with a diagram of anything you want to do, and the only important part is making sure you make clean, and safe connections at the terminals so that nothing comes apart in the box and starts a fire.  That’s more dramatic than it sounds, but you get the idea.  It’s really not that tough.  Well, usually.

In my case, after another 20 minutes or so of drawing out my mess on a piece of paper, I started to figure it out.  The Hubs heard,
    “So Red is Black, then Red connects to Blue, and if Black is common, then Black connects to Red, and White is actually my Red, so White connects to Red... Oh my gosh!  White is Red!  Jason, can you believe it?  White is actually Red!”  He looked at me for a moment like I had just escaped from Nick Nolte’s house and deadpanned,
    “No Erin.  I cannot believe it.  Wow.”  There was more than a bit of sarcasm there... I prefer to believe that he is just intimidated by my electrical genius, not appeasing a crazy person for his own safety.

Regardless, in the end we have this:


Instead of this:


Not to mention my exterior lights will be on and waiting for me to safely pull into my driveway this evening.  That's a major win in my book.  What about you guys- anyone else tackle their own electrical work?  Any other "Big wins" on the home front?  Anyone else's spouse think that they're certifiably insane?

November 23, 2011

#4- Tackling the Mud Room

After a bunch of small projects lately, I'm glad to finally check another project off The List. When we last left the Mudroom, I was getting into trouble with the Hubs. My simple "install more convenient hooks" project took on a life of its own when I couldn't help but patch the holes and scratches in the walls. 


Seriously though- look how nasty this wall was.  I can't be the only one that thinks that painting this wall was a good idea.


I raided our paint cupboard and found about a half gallon of extra Behr "Ashes" gray paint from the Guest Bedroom paint job. 


Oh yeah, and did I mention that I installed the hooks that I bought for 4 for $3 at Ikea?


Unfortunately, my half gallon didn't go as far as I thought it would, and I had to pause for the night to return to the Home Depot and buy another quart to finish up the project.  The Hubs was thrilled.

Here's how it looked 24 hours later, with the paint still a little wet in spots. 


I also painted this storage bench, which was the first furniture project I built entirely on my own.  It's also filled with shoes. (I put winter shoes in here in the summer, and summer in the winter.)  I have a problem.


And I could have only filled this closet half way and staged it beautifully for you, but you know I'd rather keep it real with you all.  Here's how the finished project looks today.

Before


After
Before

After

It's nearly impossible to photograph this tiny room, but I assure you that it looks 100% bigger, and 1000% cleaner.  And as a bonus, I took the small set of hooks that used to be in this room, and hung them out in the garage so we have a place to store our totes and grocery bags.


Ignore the unpainted wall patch left over from Bath Crashers.  They had to tear this wall open in order to wire electrical up to the new bathroom, and this is the closest it got to being completed.  Someday I'll paint this whole garage into my ultimate workshop, but for now, I'm happy to have a place to store my grocery bags. 

So was it worth it... well, maybe.  I mean, we've all got our own brand of crazy, but there's something pretty gross about living with someone else's dirt.  It was #4 on The List after all, and I had to tackle it eventually, so why not right now, at the beginning of what is bound to be a long and messy winter here in Minnesota.

I hope you all have a great Holiday weekend.  I'm going to take some days off to spend with my family and just relax.  (Hopefully I can figure out how.  I'm guessing some wine will help.)  Enjoy the turkey and we'll see you on Monday!