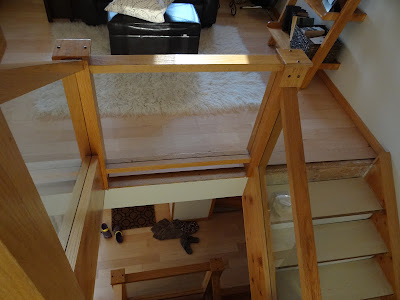
When we last left you on the steps project, the Hubs and I were cranking away at a pretty systematic approach to covering our stairs. It was a detailed process, but nothing we couldn't handle, and we were getting about a section done a night. And if that would have been all we had to do with this project, it would have been easy. But like every good DIY, we had a few randoms thrown at us.
The first tricky thing was the thresholds. At every space where the wood floors came up the edge of the steps, there was a unfinished lip- like this:
Or like this whole edge of the Loft, which I creatively decided not to show you in the wood floor reveal photos. Which means it's looked like this for the past 6 weeks. Oops.
And even down on the Kitchen and Foyer levels we had been living with these old golden oak stair nose pieces since we installed those wood floors a year ago. They might look okay from far away in this photo, but up close you'd see that we had to cut the wood flooring as close to the stair nose as possible, an then there was just a gap there where the 2 came together that we tried to fill with putty. It was ghetto.
So for each of those 9 areas we had to purchase maple stair nose molding from Lumber Liquidators to match our flooring. It took a lot of work in some cases to get the old ones out, (a few times the Hubs had to bust out the big demo reciprocating saw, and I wasn't about to wield that thing on a ladder with this belly) but eventually they were all out. The cuts were all exact and tricky, so it wasn't hard, just really tedious.
There were also a number of areas that required a bit more creative molding, like the quarter round in the photo above at the base of the steps where the riser meets the floor. Ry and I had to run back out to my favorite lumber store to stock up on a bit of specialty maple molding. He's like my own personal paparazzi.
 |
| I'm trying act like I know business with the wood workers and my 3 year old is yelling out, "Hey Mama! Say cheeeeese!" |
There were a few awkward situations we had to fix up too, like this flight of steps that were spaced pretty far apart, and had 2-4 inch gaps between each step. I've been picturing a baby falling through this space since the day we moved in, pure terror every time we had friends with little crawlers over. We started by cutting 2x4s to size and then using my Kreg Jig and pocket screws to attach it on the top and bottom.
And after all that, we weren't even close to done, because it was time for the sanding and putty. Lots of sanding and putty.
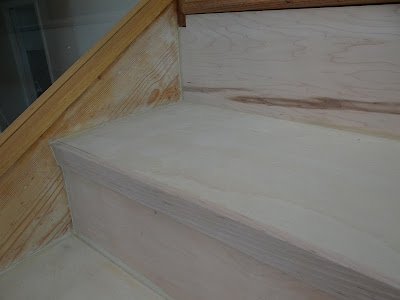
No matter how exact we were when putting in the three different types of wood on every step, it was going to take some wood putty on the seams to make it all look seamless. There also may have been a
Once you put in the putty it looks like a total mess, and even the Hubs thought I had lost my mind. Trust me baby- I got this.
Once its all sanded and smooth- perfection.
We had to fill, let dry, then sand every flight by hand. It felt like it would never end. And just when we thought it would... there was these guys.Yep, all the underneaths of the steps had to be patched and sanded too. All in these tricky little items took up our whole week last week. Every evening after eating some dinner and putting the kiddo to bed we took on a new challenge. But it was nothing compared to our marathon weekend. I'll fill you in on all that fun, plus the big reveal pictures tomorrow. Yes sir- we finished and I can't wait to show you. But right now, I need to go to bed, because tired doesn't even begin to cover it my friends.


Nice. What a lot of work--but it's so worth it! My fiance just bought a Kreg jig and is currently building his first piece of furniture. Don't tell him, but I'm pretty surprised at how well it's going! Haha. Can't wait for the reveal!
ReplyDelete