
Once we had the fireplace wall built out and ready for tile, we started to focus our attention to the other side of the room. I mean, we had big plans for this focal point side of the room:

But the other side of the room was left lacking, as seen in this super old photo from when we first moved in.
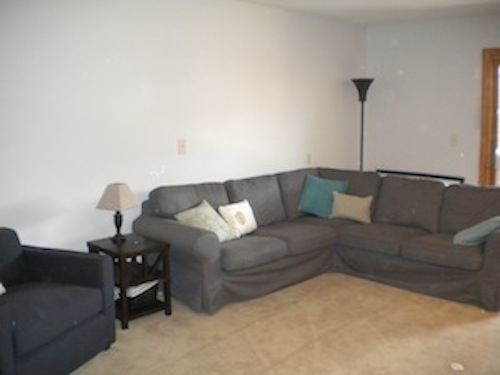
Even when we pathetically tried to add a photo gallery to this wall, it was pretty boring and nothing really felt grounded.


So I spent a lot of time searching for a solution. I didn't want to do anything too major that would complete with our focal wall, but I didn't want it to be boring and flat either. I wondered what the catalogs do with a long expanse of drywall. I searched West Elm, Pottery Barn, Crate and Barrel and a few other favorites, and here's what I found: they don't do anything. That's because they rarely, if ever, photograph a room with this scenario. Go look for yourselves, in all of their staging all the photos have these great architectural elements that help to fill up a space like a exposed brick wall, floor to ceiling windows or wood beams and pillars. They never have to deal with the typical home owner scenario of a boring wall of nothing but drywall. So after a little brooding frustration, I decided to take their lead, and if I didn't have an architectual element, I'd make one.
Cue board and batten. For those that don't know, board and batten treatment is like a wainscoting, but instead of a bead board, country feel, it has clean lined linear panels. There are dozens of board and batten before and afters online, but I think these images really show how a boring wall with pictures randomly floating on it can feel purposeful and cohesive with the addition of board and batten.
 |
| Harper Nipples |
 |
| Blue Clear Sky |
 |
| Love of Family & Home |
As I do for some of my favorite DIY projects, I turned to the advice of Ana White for a step by step plan, which you can find here:
 |
| Ana White |
Our downstairs Family Room is in a walk-out basement, and half sunken into the ground. For this reason we have a few random things like outlets mounted in the middle of the wall instead of near the floor. So creating this element right along that "sunken in" line feels really natural and intentional. I also decided to line up my board and batten exactly with the built in cabinets we decided to keep, so that you get the feeling that they were meant to be there all along, and seemlessly line the room as one consistent element. I worked with MDF 1x4s for the base board and MDF 1x3s for the top, as well as lattice pine boards for my verticals.


The only thing that slowed me down were those dumb mid-wall outlets. Turns out that when I put my top ledge perfectly in line with the built in cabinets, they ran just across the bottom of my outlet covers.


While I probably could have just trimmed down all of these covers, it would have looked pretty amateur hour, and my Dad's mantra- "If you're going to do something, do it right" kept repeating in my head. (Thanks a lot Dad!) So I took a short break from the nail gun to do a little electrical work.
First of all, if you're ever going to do electrical work, even just a small outlet or light switch change, please, please do me a favor and purchase one of these cheap circuit alerts. They are about $7 and quickly and easily tell you with a red flashing light and loud beeping if any of the wires you are about to touch are still live. Every time we watch Renovation Realities the Hubs ends up yelling at the home owners TV as they shock themselves. It's pretty funny to watch his bald head get all red as he yells, "There's no excuse for that!" Consider yourself warned.

Once I was sure my wires were safe, I removed the outlet and box, used a drywall saw to move up the outlet about an inch, and then reinstalled the box and outlet.

That left a gap under my electrical box, (and some damaged drywall), but that will be an easy fix, which you'll see in a minute.
I also had this empty electrical box which once held a phone jack and now served no purpose to anyone.

Again, I probably could have just covered this back up with a solid outlet cover, but I could visualize my Dad shaking his head at me, so I took the time to patch this space up with drywall and joint compound.
 |
| This has just one coat of patch so far, but after the second coat you'd never know it existed. |
Forgive this grainy iPhone photo, but as you can see, once the top piece of trim went up and the outlet plate when on, the hole below the outlet is covered and you'd never know it was moved.


A LOT of painting. You can see I have a few wall samples up, and we also have all the trim, doors, board and batten, cabinet frames and cabinet doors. We'll save that update for later this week. It's all starting to come together!
No comments:
Post a Comment