Showing posts with label Family Room. Show all posts

December 10, 2013

Filling Up the Big, Bad Wall

This is a little story about how I finally filled up the huge blank wall in Family Room.  If you are a long time reader I'm hoping you don't remember this terrible situation we started with.


Way back when I tried to fill this wall with a gallery of photos, but the whole thing felt really cluttered and messy.  Back when we remodeled the Family Room we added the wainscoting to try to fill up the wall better.  It helped, but we still had a pretty huge blank wall to deal with.


I have been searching for months to find just the right thing.  Since the  focal point of the room is our sexy new fireplace on the opposite side I didn't want to compete with it by putting too much in there.


I looked for months for a pair of long and skinny abstract paintings that could add a little color, but with the very long length of this wall I just couldn't find anything big enough to fill the space that wouldn't be too tall.


Finally one day I found a little inspiration in my cell phone.  While flipping through family photos that made me smile, I realized that I wanted to feature a lot more of them through out the house.  And where better to hang pics of the family than the Family Room, right?  I didn't want to create a messy gallery again though, so I played around in InDesign until I found a shape and layout I was happy with.  I measured the exact length and height of the wall, as well as the furniture in front of it.  Once I decided that I liked the line of squares, I used the dimensions of these Ikea frames to get the layout just right.


I even placed in the images that I wanted to use to get a feel for composition and balance.  I sent all my photos to Costco to get printed, because if you guys didn't know, Costco prints 12" x 12" prints for just $2.99!  Seriously, compared to every other place I found that charges you to print a poster size and requires you trim the image down to 12 x 12, they not only print this perfect square size but they do it in just one hour, and they look awesome.  Seriously, Costco doesn't know I exist so they're certainly not paying me to say that, I just wanted to tell you all about this amazing deal. 

And then it was go time.  I started by pinning up the paper lining to get the perfect height and width.


 I rocked the four foot level and pencil while my little preschool paparazzi took blurry photos.


As my little trouble machines get bigger, keeping things from getting broken in my house is getting more and more difficult.  I knew I needed something really strong and sturdy to hang these frames, so I whent with 3M picture hanging strips to keep them firmy attached to the wall.   So far so good...


Get that bubble exactly in the middle.


And press firmly for 60 seconds to get that frame to stick.


And just when I got the last one up, in a perfect little level row, this happened.


Pictures go boom.  It was like we were being attacked, two of them went crashing down within 30 seconds of each other.  The wood cracked, the glass shattered, the lamp crashed.  I swept up the adorable little feet in the room and came back with shoes and the vacuum.   I have no idea why the malfunction occurred.  I used twice the number of strips than required by the weight, and held each frame firmly against the wall for twice as long as the instructions recommended.  My wall was clean and flat.... I'm at a loss.  I also lost out in $40 worth of frames thankyouverymuch3M. 

But I rebounded and came back from Ikea with 2 more frames.  This time I installed the provided wire hangers on the back, being careful to place them in the same space on each frame.


This time I got the advice of my friendly Home Depot associate who recomended Deco Screws- which are sort of a screw/anchor/picture hanger in one. They twist in easily with a screw driver and provide a nice safe edge for the picture hanger.  


But I added a set of mounting strips to the back of each frame just incase to keep it firmly against the wall, and my little home distroyers safe.

And finally, here's the wall finally sporting a little artwork.


Oh yeah, did I mention we got a fancy new ottoman to replace the old brown one that didn't fit the room in either size or color?  The Hubs came home from HomeGoods with it one day, and I fell in love with him all over again.  That's right, he was at HomeGoods by himself and came home with a goregous, stone leather, bronze studded ottoman.  Back off ladies, he's mine.


 It was tricky to get the perfect combination of photos that meant something special to us, but had variations of composition and balance.  I didn't want them all to be photos of us just smiling at the camera.  I'm so happy with how they turned out though.  Each of these photos represent an great moment in our little family's life, and whenever I look at these I can feel the moment like it was yesterday.  *tear*


 Tiny little feet...


LOVE.

Sure, I still need a new end table and lamp that fits the space better, but I finally have something up on the wall.  This calls for a celebration.  Good thing for me the wine bar and wet bar are just steps away.


Cheers!

July 10, 2013

The Family Room Reveal- Sort Of

Here's the thing- I owe you guys a Family Room reveal. I've let this thing go on longer than a Peter Jackson trilogy.  I didn't mean to wait so long, I just really wanted to finish up the accessories in this room before I gave you the big reveal, you know, so everything could be all blog beautiful and staged.  The reality is though, that there are a lot of little items I'd like to acquire overtime to make this room feel comfy.  I just don't want to force these decisions and make it feel typical or bland.  So I'm going to continue my search for the ultimate accessories, and in the mean time, I'll show you how she looks so far.  Deal?

Here's my beautiful new baby:


Remember when it looked like this?


I still can't believe that we built in that brand new, beautiful fireplace from scratch.  Sayonara big, ugly fire beast.


Hello sexy fire maker.


 We went with a simple, oil rubbed bronze cabinet hardware on the built in cabinets. 


I installed using our worth-every-penny (bought it 6 projects ago) hardware template.  

 
The kiddo played toddler papparazzi again. 


We balanced the big TV we hung on the left with some decorative shelving on the right.


Unfortunately the other side of the room isn't as finished.  I'm still looking for a few large scale art pieces to fit on this wall.  At least the board and batten we installed helps fill the space and ground the furniture.


I'm thinking maybe some big, natural black and white photographs.  Or maybe some abstract canvases with a pop of color?  Any ideas?

 
We are still absolutely loving the new couch and chair.  The ottoman may be temporary, I'm not sure how I feel about it yet.  

The end table is too small for the space, the the lamp is probably a little too small of a scale as well.  It works for now though.  Remember- it's a work in progress, no judging friends. 


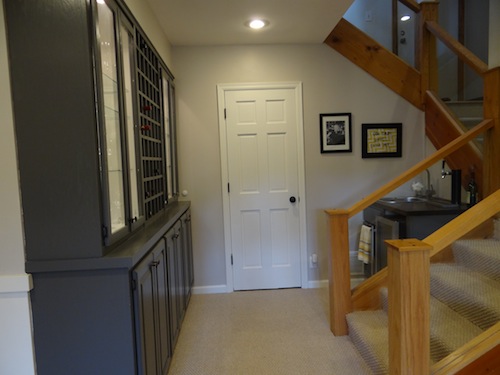
And on that far side of the room, we have our new and improved bar area.


Remember when it was an ugly corner with a cat door?


Here's another peak at the beautiful new wine bar.


Instead of a Why's-There-A-Hutch-in-Your-Family-Room Built In?


And here's the formerly empty corner that is now our built in wet bar and beer tap.


On the wall I framed a super flattering photo of the Hubs for beer drinking inspiration.  Then I created a fun way for us let people know what the beer du jour is, just by using a dry erase marker.


So there she blows.  What do you guys think so far?  Any suggestions for my big span of wall with nothing on it?  I've been scouring Etsy and HomeGoods, but I just haven't found the perfect thing yet.  If you've seen something that would work- send it my way.  Pretty please!

June 6, 2013

The Wet Bar Finale

My Mother (hi Mom!) kindly informed me this weekend that I'm really dragging out this Wet Bar thing.  She has a good point, so let's finish up this thing already- shall we?  If you remember we've turned this empty space:


To this:


And after a little plumbing and install, we have this:


Let's start with this beauty of a faucet.   We found it on Amazon with great reviews, and it had just what we were looking for; minimal profile, single handle and brushed nickle finish like the sink.  Bonus: the water flows out of it in this cool rectangular shape.


The process was pretty easy.  After three bathroom remodels doing it wrong, I finally learned my lesson this time around and installed the faucet before I installed the sink so that I had plenty of room to work underneath.  Once the faucet was in and secure, I dropped in the sink and attached it with the handy little clips that Ikea provides.  Then I just needed to install the drain and trap plumbing.


See that black line coming in on the right of the drain pipe?  That my friends is our handy little beer drain line, for this guy:


The tower for the tap line actually came with our keg fridge, so we just removed it and attached it to the counter top. For the drain we found this pretty guy on Amazon. 


In the past our keg fridge just had a plastic tray that sat on top to catch any spills, and unless you removed it & washed it each time it was used, it got pretty disgusting.  So springing for a version that could drain directly into the plumbing line (via a dishwasher pipe and hose) was totally worth it for me.   You can see below that the beverage cooler we purchased is just low enough to allow for this drain tube to connect under the counter and run into the adjacent cabinet.


 I plan to cut and paint a trim board to cover up this small gap above the fridge, but apparently I was already dragging this out, so I'll just have to show you that update later.  Added bonus of the beer tap drain: it doubles as a drying rack when not in use.


You may recall that we decided to store the actual keg fridge in the Cat Closet right next to the bar, since it was huge and had seen better days.  Forgive the mess of storage behind it, I promise that these items are placed at least a foot away from the fridge to give it adequate ventilation, it just looks like more of a cluster in this photo.


We insulated a longer line with plumbing insulation from Home Depot and ran it out of the hole in the top.  I know the top of the fridge is gross, sorry.  As I said, it's seen better days.


See how it runs across the bottom on the sink cabinet on the way to the tap?


Once everything was installed we added a few things to the cabinet to make the most of the space.  A bag for recycling and a trash can right down here keeps the mess to a minimum, and the organizer on the door holds a dishwashing wand and a bottle brush to clean wine glasses.


And that is (finally!) the story of how we took a blank and useless space and turned it into a 4'x4' square of function and style, not to mention yummy goodness. 


We've got a little decor and accessories work to do, not to mention the big Family Room reveal, but for now I'm just enjoying this fully functional space.  Anyone else adding function to a previously dead area of their home?  Doing a little minor plumbing work?  Classing things up with a keg in your basement?