
After nearly an entire summer of tinkering with the portico in my garage, I was so anxious to get this bad boy up North and up on the side of our cabin. I had pre-cut and painted all our pieces, and in my mind I had meticulously planned through every step of the install, so I figured that this step would be a breeze. When will I finally get it that DIY always throws you some curve balls, and it's never as quick and easy as it seems?
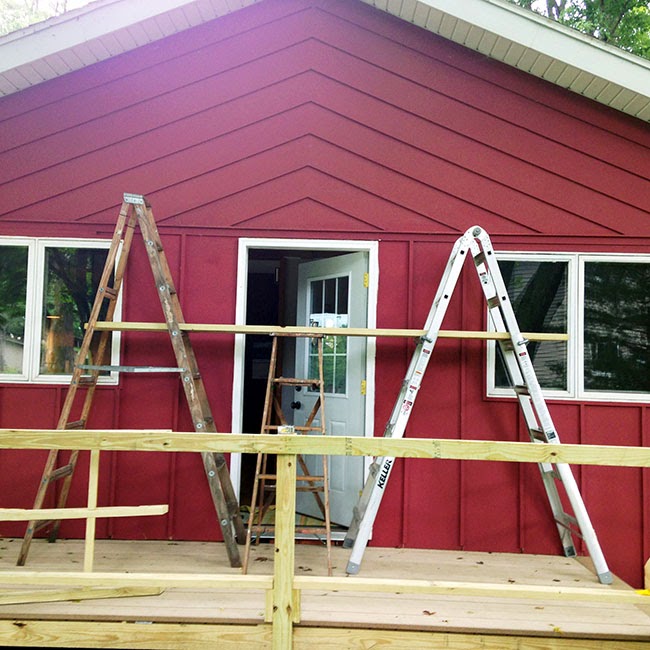
So this post is a little longer than I intended. I started with this little collection of ladders.

And it took a nudge from my Father to organize them in this far more efficient fashion. He's always telling me, "Work smarter, not harder."
The next step was to set the rafters up on the house exactly where we'd like them to go, get them level and centered, and then trace the outline on the side of the house. We used the very obvious horizontal line above our door as the base of our portico for clean lines and symmetry.

I needed to cut away the siding so that the rafters could attach directly to the framing of the house. It was pretty challenging standing on our make-shift scaffolding and plunge cutting into the side of the house with the circular saw, but I was pretty impressed with my final result ifIdosaysomyself.

I was working by myself at this point while the Hubs kept an eye on the kiddos and my Dad ran into the store, so it was a pretty tedious half an hour of cutting, lifting up the heavy rafters to see if it fit, cutting a little more, lifting the rafters, etc...

But eventually I had the perfect fit, so I installed flashing behind the siding, which should keep the rain and snow melt off the wood studs and onto the shingles to run off the roof.

Dad was back at this point so I could step back and take a photo.


If you recall, I notched away the rafters to fit our support brackets.
We had to cut away some of the house trim, and then attach these big, heavy things to the studs with lag bolts. The bolts weren't centered or they wouldn't hit the stud behind them, but we sunk the bolts into the wood so that we could cover them up with putty later.


Next up I attached my roof boards.

And then my pre-cut trim boards.
 |
| Obviously I always wear construction appropriate shoes. |
But that was about as far as we were going to get on day one. The sky started to get dark and the rain was coming, so we attached the tar paper to the roof to protect it from the rain, and packed up the tools for the day. Sad trombone.

But it was already a big improvement.

I couldn't be completely deterred, so I went up into the attic and threaded through the electrical wire for the light. I had planned on adding this light from the beginning, so back when we opened up this wall to install the door I installed an extra switch and sent the wire up through the wall into the attic where I had the end tapped off and ready to go.

The next day I got to work installing the bead board ceilings, while my brother and dad got to work on the shingles. But once again Mother Nature was out to foil our plans, and we went from sunny summer day to blowing storm in about 10 minutes.

The guys hustled to finish the shingles, racing the rain.

And literally two seconds after we got the last tool in the house and the last man off the ladder, the sky opened up.

Luckily, on the morning of day 3 the skies were clear and blue. I got to work on puttying the holes and painting one last fresh coat of white trim paint. Then I stepped back to marvel at my accomplishment.
 |
| Spoiler alert- we started on the railings for the deck, but I'll show you all of that detail in another post. |
Now when you walk up to the cabin you see this welcoming view.

Don't you love those chunky wood brackets?

The lag bolts completely disappeared behind a couple of applications of wood putty and paint.

I love the detail of how the edges of the brackets stick out a couple of inches.

Here's the view back from the other side of the deck.

My light was still on special order, but I can't wait to get that in as a focal point in the center.

It was quite the adventure building and installing this roof, but I'd like to think that it looks like it's been here all along.


And after:

Miss A Post? Here's our portico building adventure!
Step 1- Build the Portico Frame
Step 2- Trim the Portico
Step 3- Install the Portico
Or Pin It and save it for later:

This is really cool - I am so impressed! It definitely adds charm and character and makes the new door feel like that's where it's been all along... Great job. :)
ReplyDeleteLooks awesome!!
ReplyDeleteGood for you! I've been following for a few months and never comment - but had to chime in to give you a huge pat on the back for this! Amazing!
ReplyDeleteLooks AMAZING! I also love that I'm not the only one who DIY's in their dressy sandals :)
ReplyDeleteThank you so much guys! It was a labor of love, but I thought I'd post it to the internet so others would have it a little easier if they decided to take this project on. :)
ReplyDeleteVery nice! I'm in love with your location. what a beautiful spot. also in love with your project. If you ever leave your husband come see me but don't forget your tools.
ReplyDeleteThanks to your clear step by step instructions and numerous pictures, I was able to confidently construct an identical portico. Your three blogs were extremely helpful.
ReplyDeleteThanks for the step-by-step process. We're hoping to build something similar over the entrance to my daughter's basement apartment. How does this handle snow load?
ReplyDeleteSharon
Excellent end result! This is Exactly what I have in mind. Your step by step is Exactly what I needed to boost my confidence. It will be crucial to my success. Many thanks and awesome job!!
ReplyDeleteExcelente. Muito bom. O forro foi feito como? Quero fazer pra livrar minhas janelas do sol e da chuva. Lindo.
ReplyDeleteI loved reading this! I'm hoping to hire a handyman to follow these awesomely detailed directions and build and install a portico just like yours. Any afterthoughts of ideas you could have changed?
ReplyDelete