
Finally- it's time for the big reveal on the wardrobe doors I built for our Master Bathroom. Again, if you're just joining us the short story is that Bath Crashers built us amazing wardrobes without doors, so they gave me $500 to make some myself. I built them, stained them, and hung a track for them.
Then there was nothing left but to put the glass panels inside my frames. If you remember, our glass panels are actually frosted glass cupboard doors from Ikea. Which reminds me, I should probably submit this to Ikea Hackers. (Does anyone else love that site as much as I do?) I brought the frames up to my bedroom first so that I wouldn't have to carry the full, heavy door up 8 tricky half flights. Please ignore all the scattered items and unmade bed. Whenever I'm working, Ryder brings his non-stop party to wherever I'm at.

Since I had built the frames specifically around the glass panels, they were a really snug fit. Then all I did was screw some brackets into the wood frame and the aluminum frame of the glass panel to connect them together.


Why did I buy one at size #6 and one at #8? Because I'm dangerous like that.
I used one bracket at the top and bottom, and three along each side.

Then I just attached the wheels to the top of each door per the instructions on my track.


Are you ready for this? You better be, it's been the world's longest build up.
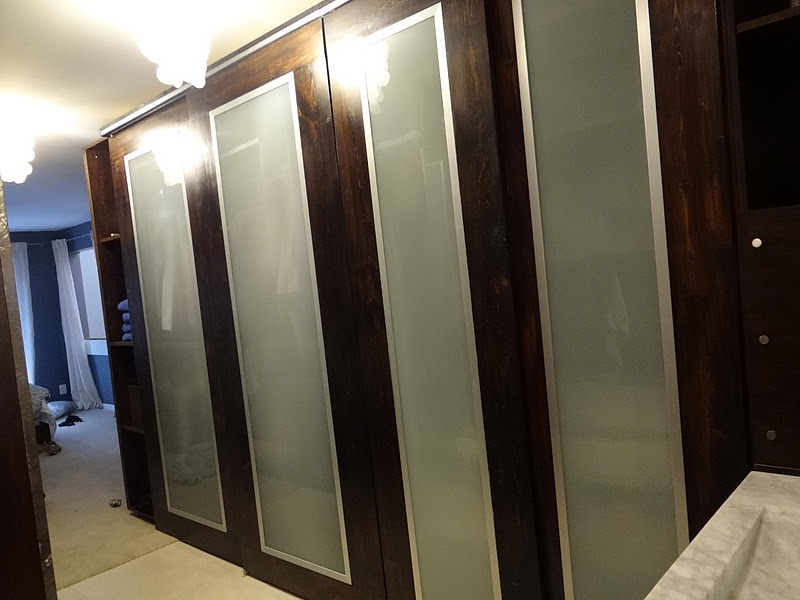

Unfortunately my camera wasn't quite up for the challenge to get the whole big system in one shot. You'll have to trust me that it looks 100 times better. Check this before and after.


I'm so proud of how they turned out, and even happier to tell you that the total damage was only $370, leaving us $130 for other projects. Bou-jah! Great news considering we have a big, bad bathroom remodel coming up shortly. But for the time being I'm just going to enjoy this amazing 3 Day bathroom remodel, finally finished after 4 months. Cheers!
Looks great! Cant believe you did it all so inexpensively. Must be a relief to be done :)
ReplyDeleteWow, that does look 100 times better!! Great work!
ReplyDeleteThose are amazing!! :) Great job!
ReplyDeleteOoh! They look so professional! We're working on a closet makeover right now, and are planning some sliding doors. And by planning, I mean "thinking what a great idea they'd be." We haven't moved beyond that...
ReplyDeleteWhoa, that looks amazing! I can not believe you guys did it yourselves. I am well impressed, great job :)
ReplyDeleteLooks great, Erin! Way to go, chica! You've gotta be proud of that one, especially when you walk in there every single day... :) Kudos!
ReplyDeleteAnd I love the new lighting!
ReplyDeleteThis is truly stunning! Congratulations on a job well done!
ReplyDeleteHey friend,
ReplyDeleteYour style of presentation is very impressive. The meaningful contribution of your mind reflects on those people who are looking for new ideas and informations regarding aluminum kitchen cabinets. I would like to tweet on it and keep spying at every moment you blogging.
Hello,
ReplyDeleteThanks for the tips. Usually, I do not post on blogs, but I wish to say that this post really forced me to do so! Thanks, incredibly nice article. Thank you lots, I am obliged to announce that your blog is excellent!
What a major overhaul! The colour is just too fantastic, and you got a great choice there. It's very organised. Good job for this one!
ReplyDeleteWhat size door from ikea did you get the glass from. I am trying to locate it on the website!
ReplyDelete