
Last week I promised that I was finally going to put my money where my mouth is and get to the big window removal/door removal/window install project. Good news friends- I was able to head up to the Cabin with the boys for an extra long weekend and we got a ton done! *brushes shoulders off*
I have about a thousand photos and, as always, way too many words, so I'll break it up for you in a few posts.
If you're just joining us, the Cliff's Note's version is that we added a new front door to our cabin in order to build a third bedroom in the old entryway. While the new front door and bedroom are functional, there were just a couple last steps remaining; remove the old front door from the bedroom and replace it with a window.

 |
| We've already started to wear a path to our new front door. We'll work on the landscaping and hardscaping next spring. |
Lucky for us, we had a window to spare. The Great Cabin Plan includes installing a fireplace and mantel in the center of our Living Room wall, and flanking it with floor to ceiling bookcases. This off center window had to go, and it was the exact size and style of all the other windows in the cabin, so the hope was that it would fit right in to it's new spot and look like it always belonged there.

So on Day 1 when I arrived at the cabin, I started by carefully removing the trim from around the window so that I could reuse it in it's new place.

Once the interior was clear, I grabbed my ladder and headed outside.

Once again I carefully stripped the molding, first the siding trim and aluminum casing:

And then the brick molding:

With everything clear, I could run my reciprocating saw with a metal blade around the edges to cut any of the nails holding it in. To be honest, it was way easier than I thought, and then the window just tipped in for a quick and easy removal.
Then I cut 2x4 studs to the length of my opening, and installed them into my new hole, (16 inches on center.)

I covered my new hole with scrap plywood on the inside:

And on the outside filled the hole with a plastic vapor barrier, insulation, and then another piece of scrap plywood:

- Window and molding removed without destroying any of it- Check!
- Hole filled in and insulated- Check!
On Day 2 I couldn't get started tearing out this door fast enough. Take one last look at my brown, gross wall.

Then I started by removing the interior trim, and Little Man helped. (Don't worry, those exposed wires in the wire box above him are all completely dead.)

Again, I went back outside, and first removed the screen door:

And then the trim:

Same as the window, with the trim removed I could take my reciprocating saw around the edges and cut any nails attaching the door to the frame. With the nails removed, I could carefully tip back the door.
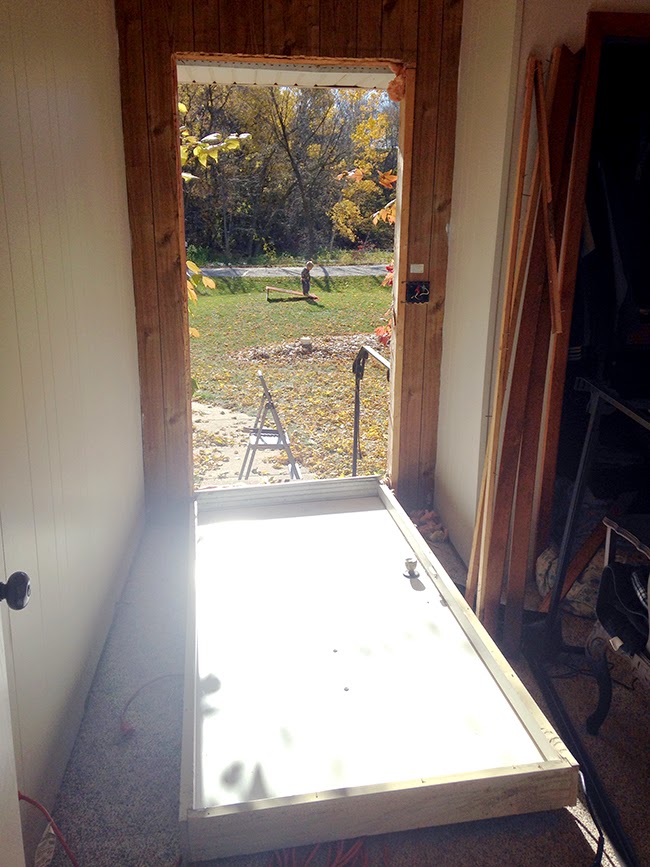 |
| Boom. |
Cue the forth, "Well, now I've done it. I have a hole in the side of my house" moment that I've had in 2014. (Here's the first and the second.)

In order to install the old window in this new spot, I needed to build out the frame work. After triple checking my rough opening measurements (which is 1/2" wider and taller than the outside of your window), I started to build my wall.
 |
| Not a bad day of work when you're looking out at a glorious day like this and your kiddos playing in the lawn. |

Once the window was in I could measure exactly how much paneling I needed to cover the wall. I carefully removed the old paneling, as to save money I would need to put some of it back up again in a slightly different spot. (And I'm nothing it not

Here's what it looked like from the outside, with just the plastic vapor barrier in below the window.

It was getting late though, so I filled the studs with insulation, sprayed expandable foam in small gaps around the window, closed the window and called it a night.

Believe it or not, that's what a successful Day 2 looks like.
- Door out- Check!
- Window where the door used to be- Check!
- Wall insulated- Check!
I don't want to leave you hanging, so I'll be back soon with how I put this Humpty-Dumpty back together again!
Wow what a great project and things turned out real nice. The window and door are perfect and the place looks absolutely perfect. Love the color of the walls. My wife also commented and said the wood look really suits the cabin. Such a nice place for a get away. Love the work keep it up and keep posting. Thanks.
ReplyDeleteGiovanni @ Coastal Contract Hardware
Window replacement represents one of the more substantial investments you can make in your home. The replacement of old or under-performing windows can effectively reduce your monthly utility costs and give your home a bit more curb appeal.
ReplyDeleteWindows And Doors Phoenix
Replacement French Doors