September 14, 2012

Sewing Nursery Decor

After I successfully created Sewing Project #1- three crib sheets for the Nursery, I was feeling pretty confident in my ability to create my own Nursery fabric décor.  I hunted online for the perfect combination of fabrics at a low price.   And as usual, I over did it.

Sewing Project #2- Contoured Changing Table Cover.  I used this tutorial I found online, which was very easy to follow.  I went with a super fun houndstooth pattern that I found at Fabric.com, which was the perfect combination of modern and rustic hunting lodge that I was looking for.  I made just 2 of these (in the same fabric), as I learned from a smart mama my first time around that if you keep a pack of old school cloth diapers in your diaper drawer, and throw one of those on top of your pad each time you change baby, you’ll keep your pad clean 95% of the time.  It’s easy to toss the cloth diaper in the hamper each time, and you’ll always be changing baby on a clean surface.  Genius.


Sewing Projects #3- Boppy Covers.  I loved my Boppy feeding pillow and used it daily for the first year of Captain Chaos’ life.  My only cover was a bit stained though, not to mention lime green with polka-dots all over, so I picked up some rustic looking and soft flannel fabrics in orange, rust, tans and creams.  I used this pattern to make my first cover, but to be honest I wasn’t thrilled with the final result, as the fit is pretty baggy.


Good thing I saved my favorite flannel fabric for attempt #2.  This time I used my Boppy and just traced the outline right onto my fabric with a 1/2” extra.  I only traced half of the Boppy and placed it on the fold so that when I cut it out both sides would match up perfectly.  The fit on this one turned out perfect, so I’ll use this one the majority of the time, and only switch when it needs to be washed.


On to the daybed.  From the start I really wanted this piece to feel more like a couch or piece of furniture than a bed, so the key was to find more substantial cover for the mattress, and not use a standard fitted bed sheet.  I originally found this one online at West Elm, and ordered it twice, (yep, you read that right), but both times they sent me a box spring cover instead of a daybed cover, until finally I was told that the Daybed Cover is now discontinued and not being sold.  (P.S.- Looks like they haven’t informed their website yet, because it still allows you to purchase one.  I wouldn’t recommend you try though, unless you enjoy waiting weeks to receive a product that never actually comes.)  After West Elm confirmed that they didn’t sell the product that they sold me twice, I did a web search for tutorials on how to make one.  The idea is easy enough, but I knew it would be the large amount of high quality fabric that would kill me.  That’s why when I stumbled upon this burlap cover from World Market online, I practically threw my credit card at the computer screen.  I love the corded edges which make the piece look more finished and like a custom cushion.  The burlap is really soft (I’ve already napped on it a couple of times), but it is quite thick and durable too so I know it will hold up to the wear and tear. 


Sewing Project #4- Daybed Pillows.  With the mattress covered, it was time to make that bad boy more comfortable.  Much to the Hub’s disappointment, I’m a pillow hoarder, but in this case it was a huge benefit because I happened to have 6 pillows left over from past décor that were just waiting for a new life and a new home.  I sewed four 20” x 20” squares, and two 17” x 13” smaller rectangles.  I didn’t get to fancy because I wanted them first and foremost to be comfortable, and let’s be honest- I was already over doing it. Luckily I had a ton of zippers left over from the West Elm Outdoor Sectional Cushions project, so all of the pillow covers can easily be removed and thrown in the wash if baby (or I) make a mess.


And to my surprise I also found in storage a couple of rust orange pillows that I had made back in the Bungalow which work perfectly with the color combination and give the piece a more cohesive feel.  Score 10 points for hoarders!


Sewing Project #5- Crib Skirt.  It took me a long time (and a couple of misfires) to find the right modern, geometric pattern to cover the space in the crib when the mattress is adjusted all the way up.  (Hooray for Fabric.com’s completely free return shipping.)


I didn’t follow a tutorial on this one, instead I first cut a piece of scrap fabric to the exact size of my crib mattress (well, just a few inches less so that the scrap would always be hidden under the mattress.) Mine was 68.5” x 43.5”.  I actually used the old yellow curtains that the previous owners left behind in this room as my scrap.  Free = Good.  Then I cut two 13” x 70” and two 13” x 45” pieces of the good fabric for the skirt. (I added .75” on each edge for a clean hem, or 1.5” total to the length.)  I ironed a 1/4” hem on three sides, and then folded it up again and ironed another 1/2” hem so that I’d have a clear and straight hem line on all exposed edges.


Once ironed, I stitched 1/4” from the edges on all three sides of each of my 4 pieces.  Then I pinned the skirt pieces onto my scrap (right sides together) and sewed all around.  


Bam- crib skirt!


 I still have one more sewing project to share, but let’s save that for later since there’s only so much sewing boredom I can put you guys through in a day.  I have to admit, I definitely prefer a table saw to a sewing machine, but when it comes to saving a buck, you can’t beat the price of DIY.  I spent $67 total on fabric for this Nursery, and from that made 3 crib sheets, 2 changing pad covers, 2 Boppy covers, 1 crib skirt and 6 pillows.  Considering I could have easily spent $67 on 2 throw pillows, I’m going to have to go ahead and proclaim myself the winner on this one.  I’m loving how all the fabrics and textures are coming together, and I can’t wait to get things up on the walls next!

September 12, 2012

Sewing Baby Bedding

First of all, thanks for all your kind words about our little plumbing debacle.  The good news is that we believe at this point that all the plumbing is fixed and the leaks are gone, and we didn't even have to rip up the shower!  The bad news is that my Dining Room is still a total disaster.  We're in the process of getting a few quotes to see if we can get someone to take care of the ceiling for us.  (I think I've earned the break.)  Working with contractors had a whole other set of frustrations though, as we're still waiting on bids and my belly feels like a ticking time bomb.  Hopefully this issue will be over soon, but I'll keep you guys up with all the details. 

In the mean time it's back to the Nursery, because this little guy still needs a place to sleep.  I didn't do myself any favors with the Nursery design though, because instead of finding a way to use the old Dwell Studios crib bedding and stuff we had in our first Nursery, my vision this time around was for a more complex combination of patterned fabrics and textures that would work with the Old World Explorer vibe I was going for. 


 After some extensive online shopping, I came up pretty disappointed in my choices, both in terms of finding a look that I liked and price that I could afford.  In the end I begrudgingly decided to make my own fabrics, starting with the crib sheets.  I was a bit intimidated at the idea of making sheets at first, mostly because I've never done it and I know they need to stand up to a lot of durability and washing. I found some great references online though like this one that convinced me that it should be pretty easy.

First things first- cut your fabric to 45" x 71", which is even easier if you buy 45" width fabric.  Then cut a 8.5" x 8.5" square out of each of the 4 corners.


 Bringing the right sides of the fabric together, sew the edge of each of the 4 corners together, making a pocket.


 I don't have a fancy sewing machine, so when it came to sewing the elastic pocket, I had to do it the old fashion way.  First I went around the entire bottom of the sheet ironing the edge up 1/4".  Once I made it all the way around, I folded the edge up an additional 1/2" and ironed the edge again,  This gave me a clean and even elastic pocket, and no exposed edges that could lead to fraying with multiple washes.


 Then I just sewed along my hem to close off the pocket, making sure I left a little section open in one of the corners to put in the elastic.


Next you pull in a 90" long piece of 1/4" elastic. Long ago my Mom taught me that the best way to insert elastic is to attach a big safety pin to the end.  The safety pin gives you something to bunch your fabric around and pull the elastic though your pocket.  It was a little time consuming, but I just pulled it through while catching up on Boardwalk Empire episodes.   (Have you all watched that show by the way?  I'm in love with Steve Buscemi in a creepy way.)


Once the elastic is all the way through, you just sew your 2 ends together, and then sew up the opening you left in the hem.  ( I go over and back on the edge of the elastic about a dozen times so that they never pull apart from each other.  Nothing is worse than having to pull the whole sheet apart to put your elastic back together.  (Except maybe water leaking into your ceiling from your bathroom for over a year... but I digress.)

And here's the final result:


A nice, safe and tight fit with a super soft broadcloth fabric that is just the perfect shade of rust orange.  I went ahead and made 3 of these sheets, since if I remember correctly babies somehow find a way to ruin their bed multiple times a night.  All three sheets cost me just $14 (thanks to some 50% off fabric coupons), which was FAR better than the $25 per sheet price I was finding online.  

The sewing fun has just begun though:

- 3 Crib Sheets
- 2 Changing Pad Covers
- 2 Bobby Covers
- 6 Throw Pillows for the Daybed
- 1 Crib Skirt
- Fun Mobile Project

More on all that later this week though.  I'm pretty excited about how it's all coming together.  How about you guys- has anyone else sewn their own fabrics for a Nursery?  Ever sewn sheets before?  I'm actually really surprised on how easy it was, not to mention affordable, and you guys know how I love a bargain.  


September 4, 2012

You've Got to be Kidding Me...

When the Hubs and I found out I was knocked up at the beginning of 2012, we made a plan:  Remodel the Downstairs and Main Bathrooms, add 700 sq feet more wood flooring and finish the steps all before the third trimester.  Basically, work our booties off for 6 straight months so that at the end of it all, the house would be in order, and there would be nothing left to do but rest and decorate our little one's nursery.   You know, the fun stuff.   And then this not-so-fun thing happened.


Picture me in the Dinning Room one evening, seated at the table sewing some crib sheets for the Nursery.  Captain Chaos was fast asleep and the Hubs went upstairs to take a shower, so I was enjoying the quiet moment listening to some music and creating items for my little baby's new room.  Bliss.  

Suddenly: Drip.  Drip.  Drip.  At first I thought I was imagining things... maybe I bumped the vase and spilled some water.  But there it is again... and it's definitely coming from the ceiling.  A slow but obvious drip.  That's when I took a look up and noticed this little brown spot on the ceiling:


And the rust that appeared to be building up on our gorgeous new chandelier. 


My heart sank, and I knew that what appeared to be a little problem on the exterior, was going to be a lot larger inside.  I can't believe we didn't notice it sooner actually, but to be fair we don't spend a lot of time in the Dining Room, and certainly never when someone is in the shower upstairs.  And really- how often do you look up and inspect your ceilings?

For those of you that have been reading this blog for awhile, you know that this isn't the first time our Dining Room ceiling has been ripped open.  The Master Bathroom that Bath Crashers created for us is located directly above the Dining Room, and the first hole happened when one of the Bath Crashers contractors literally fell through the ceiling while working, and the second hole happened again about 2 weeks after they left when we found the first water leak.  From the look of the rust on the light we knew that this slow leak in the ceiling had been going on for a long time, most likely the full year since Bath Crashers left.  We immediately contacted our show's producers to tell them what was going on and show them the photos, and they replied, "You're on your own on this one.  Have a nice weekend."  Fan-friggin-tastic. 

Step #1 was to take down the light.  Bad. News.  As it started to come down rusty brown water immediately began pouring out of the top of the fixture.  The electrical wiring was discolored from the rust and literally sitting in a puddle of water.  It is a miracle that our house didn't start on fire any one of the hundreds of times we've flipped that light switch on and off this past year.  I didn't get a picture of the moment, because we were too busy panicking (or cursing if you're the Hubs.)  Here's what the top of our fixture looks like now though, imagine 1/2" of standing water in there.


Step #2- Cut open the ceiling.  The good news is that we have a great friend that is a plumber, and was willing to come over to take a look.  The bad news is the only way to find out what's wrong is to open up the ceiling. We started at the most obvious and still damp brown spot, and unfortunately had to make our way across the ceiling. 


 All the while finding damaged wood, soaking insulation, and puddles of brown water.  Awesome.


And to our surprise we found, not one, not two, but three leaks in the plumbing of our "new," fancy & expensive Bath Crashers shower.   The biggest one was coming from this drain pipe that was never sealed correctly with ABS glue.

The black shiny stuff at the joint is the glue that holds the seal.  There was no glue on large portions of the seal when we opened it up.
The next leak was coming from the trough drain that was installed.  They never used any grout or silicone to seal where the drain and the tile came together, so water got up under the tile and leaked down through the ceiling. 


The third leak is much more unfortunate, as it is coming specifically from one of the body sprays in the shower.  We're pretty sure that there is a leak at the connection point, which is in the wall of the shower, and we're still waiting to find out if we're going to have to tear out the tile in the shower to fix it.  I don't want to talk about it.


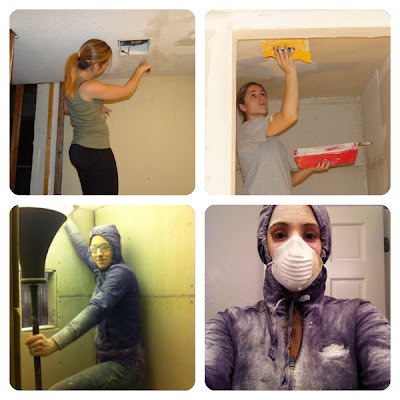
Even if the tile doesn't have to be torn out, we still have the issue of repairing that ceiling, which means patching, scraping, skim coating and sanding.  And can I say that for this pregnancy, I've had enough of that?


Especially now that I look more like this:

This happy photo was clearly taken before we had to rip holes in our ceiling.
So much for having all the tough work done and enjoying the third trimester.  Now its all systems go to get the plumbing fixed and the ceiling closed back up before baby gets here, as I definitely don't want all that Sheetrock dust around for baby to breathe in (much less the rest of the family.)  Wish us luck, Lord knows we're going to need it.

August 30, 2012

He's Got the Whole World In His Room

After all that hard work building the West Elm inspired daybed for the Nursery, I had a little problem.  The plan originally was to place the crib on the far back wall of the room, under the alcove, with the changing table/dresser to the right as you walk in, and the daybed filling that new blank wall we had created, which is on the left wall of this photo:


But the minute the Hubs and I moved in the daybed, it was bad news.  Although I had measured out the layout hundreds of times, and even mocked it up with tape on the floor, in reality the daybed and crib came up right next to each other, and made the entire room feel cluttered.  Like we had just tossed in a bunch of furniture into it that didn't fit.  Unfortunately I didn't take a photo for you guys, because I was a little too busy freaking out.  I had just built an entire bed, and I had no idea what to do with it.  I spent the first few minutes saying things to the Hubs like, "I swear I measured this...." "I'm going to make it work..." and a little overly dramatic "Stop looking at it with your judging eyes!"  Eventually I kicked him out of the room and told him I would handle it.  Because he is smart and values his life, he went quickly and allowed this pregnant lady to implode in private.

I was desperate, so I first tried switching the crib and the dresser.  (Don't worry that I was doing this by myself, the crib is on wheels and the rest of the furniture was super light.  I just took it easy moving it a little bit at a time.  Trust me, everyone was better off that I was doing this myself.)


It certainly helped that back wall feel less cluttered, but I didn't love that you walk into the room right smack into the crib.  So I took a little more time and flipped the beds.


Not exactly what I had in mind, but this one is going to have to work   I like that since the daybed is so low profile, that even though it's the first thing right as you walk into the room, it doesn't feel to large or imposing.  The arms of it are light and airy which helps, and I like getting to show off those cool rectangles I worked so hard on.  It also fits perfectly below the window, and since this room only has one traditional window (with two big skylights on the ceiling),  I don't want to block the view of it in any way.  It still feels a bit awkward, but I think it will come together when I start to put some things up on the walls.  Speaking of...


Once I settled on a location for the crib, I got started installing the old world wall decal I found on Etsy above it.  I always feel like the hardest space to decorate is above a crib.  It is usually the focal point in a nursey, just begging for something to be placed above it, but your decoration choices are limited based on little hands and safety issues for the little sprout.  This fabric wall decal was the perfect solution for me, as it was large, but its neutral colors blend in with the room nicely. 


Somehow this magic fabric is durable, yet unlike most decals can be stuck, removed and re-stuck multiple times.  It made installing it a breeze, and should be easy to wipe down with a damp cloth if Baby Boomer decides to pee on it or something.  (It could happen.)  I just used my laser level as a guide across the top and voila!


I think it fills the room nicely and fits the look I was going for.  And at just $65 for a 60" x40" wall mural, it was a complete steal.


 I still have a long way to go in this room to make everything feel more cozy, but I'm making progress.  (I also have a long way to go with my camera to figure out how to depict the actual color of the orange in this room (more like a muted rust) instead of what's showing (a bright pumpkin orange.)  Baby steps.  Quite literally actually...

PS- I was not compensated by Janette Design for talking about her awesome wall mural, I just love to share a great product when I find one.


August 24, 2012

Building a West Elm Inspired Daybed

The best thing about DIY is with a little courage and practice you can have West Elm taste on a Kmart budget.  Last year I fell in love with the West Elm Outdoor Sectional, and saved over two thousand dollars by building it myself.  So I did a little happy dance when I found these plans for the West Elm Rectangles Daybed on Ana-White.com, which I wanted desperately for our Nursery.  I'm not going to walk you through every step of the building, since Ana does it so clearly, but I'll give you the general process as well as some notes I would add to make the process a little simpler if you plan to build this daybed yourself.

First I started with this pile of wood.  I've noticed that a lot of Ana's plans call for x3s (as in 1x3s or 2x3s...), which are hard to find in Minnesota.  I ended up finding x3s at Menards in the framing lumber area, which meant it wasn't great quality, but I figured since I would be painting it all, it would be fine.  All the wood cost me just $53.

And after 45 minutes of cutting, I had this:


*Note*- I thought I had an extra 1x2x8 left over after all the cutting, but turns out she forgot to include the (24) 2.25" 1x2s on the cut list.  She accounts for it in the materials list so you buy enough, but don't forget to cut these little 1x2 pieces as well.

Ana has a smart plan for making H's and T's instead of rectangles so that you can easily nail the pieces together, (rather than trying to fit your tools within the small spaces.  My little man was a super helper on this project, he put together the H's for me and then brought them over to me to assemble.  Best. Project. Partner. Ever.


  *Note*- Ana's plan has you using a Kreg Jig and pocket screws for all of these connections.  I can't imagine how much filling that would be, and personally I bet it would look quite messy.  For all my decorative pieces I just used my finishing nailer and wood glue.  I found 2 small nails close to each other in the center prevented the wood from cracking, but also made it so the pieces couldn't rotate or spin.  Once the glue dried, the joints were strong.


After you make all the H's, and T's you fit them together with precut pieces on the top and bottom.


*Note*- Ana doesn't have you attach the 2.25" pieces to the 6.5" pieces first that connect the H's and the T's together.  I highly recommend you put these together first  in little Ts so that you don't have to try to get your tools in the small rectangle later.  As you can see in the photo above I didn't do that for the back piece, but got smart for the sides.


I did use my Kreg Jig to firmly secure the structural parts of the bed, the legs, arms, top bar, and the arms to the back of the bed.  To keep a low profile on this daybed (and to give maximum exposure to those sexy details along the back) I opted to install wooden slats along the bottom of the bed instead of using a box spring.

*Note* Ana gives you a visual on how to install the slats, but doesn't tell you how much wood you will need.  Add (17) 1x3x8s to your shopping list if you plan to go this route.

Once again my little man helped me by placing the 34 slats on the bed and I measured and secured them.  Ry loved helping make this special bed for Boomer, and I love that he'll have the memory (or at least the photos) of him creating something special just for his baby brother before he was born. *Tear.*


Put it all together and what have you got...


My inside decorative pieces are already white, since I found a pre-sanded, pre-primed 1x2x8s.  They were really affordable, and they saved me a lot of time on the finishing stage.  I did still have to go and apply wood putty over all my nail holes and joints though.


It was nothing that a couple days of sanding couldn't cover up though.  I started with 120 grit on an electric palm sander (since my wood was so rough to begin with), and finished with a 320 grit on a hand sanding block to make it baby smooth.  It was a bit pricier, but instead of hand painting, I went ahead and purchased primer and white gloss spray paint, for a smooth and even finish. (The spray paint cost $21 total.)


It took about 7 cans of spray paint in all, but it was totally worth it in time (and frustration) savings.


After a few days outside to cure, the Hubs and I finally hauled this beast inside.  Then I had a preggo dance party.


 I will say, if there is one thing that I've learned from this house, (and seem to keep forgetting) is that your project is only as good as the lumber you use.  While the bed looks great, I can't help but wish I hadn't purchased a slightly higher quality lumber to achieve a smooth and shiny finish.  The vibe for this room is supposed to be rustic though, so I'm going to give myself a little pass.  

Now that all the tricky details are done, I can't wait to start decorating this room.  More on that soon!