Showing posts with label Kitchen. Show all posts

October 22, 2012

Kitchen Reveal

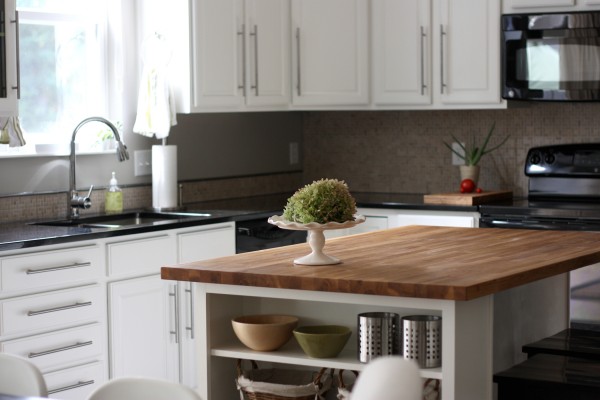
Those of you that have been following our blog for awhile (thanks Mom!) will know that we've been on the fence about painting the wood in the Kitchen from the beginning.  We tried to make a few small updates without painting, but in the end we just didn't achieve the look we were hoping for.  So in the end Hubs took advantage of the fact that I was knocked up and somehow convinced me to hire a contractor to paint our kitchen while we were in the hospital with our latest little DIY project.  It might of been his best decision ever, because here's our kitchen now:


We went with Moonshine by Benjamin Moore for the cabinet color- mostly a white with a little bit of gray in it to hide fingerprints and blend better with the black appliances.   It's easier to appreciate the change though if you see where we started:

Listing Photo

Phase #1- Floors, counter tops and backsplash
Now

Or this view from the other side:
Listing Photo

Phase #1- Floors, counter tops, backsplash

Now
Before we felt like the granite counters we added and the gorgeous backsplash tile just wasn't being showcased like it should.


 Now I think the counters look sleek and incredible, and the backsplash sparkles. 


 I'm thinking some simple, clean window treatments might be in the future.


There's still a bit more work we'll have to do on this other side to make it interesting, but I'm thinking that's just a matter of making it "pop" in those glass front cabinets.  Stay tuned on that.


My favorite thing is looking out this window into our backyard.  Everything feels so much more open and crisp. 


 So what do you think?  Good change?  Would you have left the wood, or do you like the painted look?  The room feels so much cleaner now, since the old wood was really damaged in a bunch of places.  I'm thrilled with the upgrade, and now it has the Hubs thinking about finally painting the Family Room.  Yep- you heard me, we just brought home a newborn and the Hubs is already itching for another remodel.  I'll have to hold him off for as long as I can... wish me luck!


October 17, 2012

Last Minute Renovation

We had been saying for months- once we're done with the 2 bathrooms and the steps, it's on to the Nursery and then time for a DIY break to give us time to chill out with our little man.  Really.  And we meant it. Until- well... we didn't mean it any more.  For the record, it wasn't entirely our fault.  As you may recall, first this happened.


The Hubs and I agreed that considering I was 9 months pregnant, and refinishing the ceiling required a lot of ladders and a lot of mess, this was a project that we just were not going to take on.  Although I'd be lying if I said it wasn't a struggle to decide- especially once the quotes started coming in.  I mean, it's just not in my nature to pay someone $750 to do something that would cost me $25 to do myself- and that was our lowest quote!  But I wasn't getting up on a ladder for hours on end, and the Hubs didn't feel comfortable doing it considering that I've always been the sheet rock re-finisher in the family, so we agreed it was time to let the pros come in. 

And that's how it came to be that a highly recommended contractor was at our house quoting the job, and we noticed on his business card that he also does paint work, so out of curiosity we had him give us a quote for painting our kitchen cabinets and trim.  And we were shocked with how affordable it was.

For the record I always planned to do the Kitchen paint project on our own, and the Hubs had always planned to hire someone.  Maybe that's why we hadn't tackled the project yet, we were just agreeing to disagree. The Hub's opinion was cabinets were way too big and dramatic of a project to do ourselves. His fear was that we would see drips or brush marks and always regret it.  True, I have researched a lot on the topic, and there are dozens of bloggers out there that in retrospect suggest getting them professionally sprayed or using enamel for a more professional finish.  But the kicker for me was when I asked John and Sherry from YoungHouseLove to give me their honest opinion of the cabinets they just meticulously painted themselves, and they replied with the very honest, "you get what you pay for."  

So somehow, before I knew it, we had agreed to work with our contractor, and to have him not only do the ceiling in the Dining Room, but paint the entire kitchen as well.  He said it would take 5 days, and Boomer was due in 15, so we crossed our fingers that the little guy would stay in there.  The Sunday before he started, we removed all the cabinet doors and brought them out into the garage.
 

And pulled out the shelves from the glass front cabinets and removed the green contact paper I put up previously.

 I'll be honest, it was a little scarey to be creating such a mess so close to due date. 


But we had all the time in the world... so we thought.  On Monday our guy James showed up for his first day of work and got a ton done.  That evening I was celebrating the amazing feeling of someone else doing work in your home while you kicked your feet up on the couch and ate ice cream- when my water broke.  Operation "Keep Baby in There at Least Until Friday"- failed.  Not that we were disappointed, how could we be?  Our little guy was just anxious to meet us.  When we returned home from the Hospital on Thursday morning however, things were still a little chaotic...


...but exciting.  We did our best to stay out of the contractor's way, mostly spending time back in the Nursery cuddled up on the daybed.  It took us a bit of work to get the place back together, so stay tuned for the big reveal post coming up soon- I can't wait to show you guys how it turned out!

How about you guys- are there projects that you're willing to pony up the money for someone to do for you, while others you want to save the cash and take on yourselves?  Anybody ever take on a project they wish they had hired out from the beginning?  I'll admit it- the Hub's was right on this one.  It was really nice to have this work done for us so quickly, as it would have taken us weeks, if not longer.  And clearly we didn't have that kind of time.

March 6, 2012

#49- Kitchen Light Upgrade

One of the things we've been wanting to replace since the minute we moved in was the big, glowing casket coming out of our kitchen ceiling.  

Exhibit A:

And Exhibit B:


We've come along way on this room, huh?  But enough of the patting of the back... let's dismantle that light!


 I removed the bulbs and the housing cover to expose this florescent disaster.


 Which thankfully didn't take too long to adios.


But those five big circles on the left hand side weren't making me very happy.  Either were all the nails they used to attach this big brown box to the ceiling.


I won't sugar coat it, once this big bad boy was down, we weren't thrilled with what was left.  It doesn't help that our kitchen has the dreaded popcorn ceilings, which you know we love to remove from this and this post, (are you picking up on the sarcasm, because I'm laying it on pretty thick.)


Here's the flush mount, understated option we picked to put up in it's place... in a mess of jacked-up popcorn ceiling.


Yikes.  I'm not sure how we're going to fix it just yet.  We swore after the bathroom ceiling that we'd never work on our own popcorn ceilings again, but I'm sure it will cost us a small fortune to hire it out, money that we need to spend on our next bathroom.  Maybe we should have just left the coffin.... but the room already looks so much bigger without the huge box filling up such a big space.  I guess we'll just take this one project at a time... and save this next project for a time when I'm feeling a little more brave.

How about you guys?  Anyone else get head over heels into a home improvement project and couldn't find your way out?  Remove a light to find a popcorn ceiling mess?  Have terrible florescent tube lighting in your house you can't wait to tear out of the ceiling?  I can't be the only one.

November 8, 2011

Doin' the Dishes

Confession time: I'm a little stressed out.  While it may appear from my blog that we're cranking away on projects and enjoying the fall, the truth is that it's been a pretty crazy past month.  That's crazy with a Cah-ray and a Zah-eee.  My work has been incredibly busy, and I had a string of 23 days in which I worked 22.  I've also had to go on two, three day long work trips, and as anyone who travels for work knows, those trips can feel like lost time back at home.  Especially when the Hubs is working long and strange hours too, so we need to arrange for the little one to go stay at the grandparent's for a few days.  So I was thrilled when after coming home from my recent work trip, I found this in the kitchen:


Oh wait, did I say thrilled?  I meant ready to shoot someone.  Sorry for the confusion.

Not trying to come home all Bitchasaurous Rex, I started with the casual lead in.

Erin: "Hey Hubs, missed you.  How are you?  Say, what's the situation going on with the sink over there?"

Hubs:"Oh that?  Dishwasher is full."

Erin: "Oh... sure, sure.  Makes sense.  Totally.  Hey, what do you think?  Should we maybe run it?"

Hubs: "Don't have to.  It's full of clean dishes."

Erin: "Oh.  Full of clean dishes.  Got it.  And the sinks full of dirty ones.  Apt place for them I guess."

Hubs: "I get it.  I've been busy.  I'll empty it."


See how that just happened?  Just call me the Husband Whisperer.  Although maybe he's the genius around here, because before I event realized it I headed over to the dishwasher to start emptying.  Which is when the real problem began.


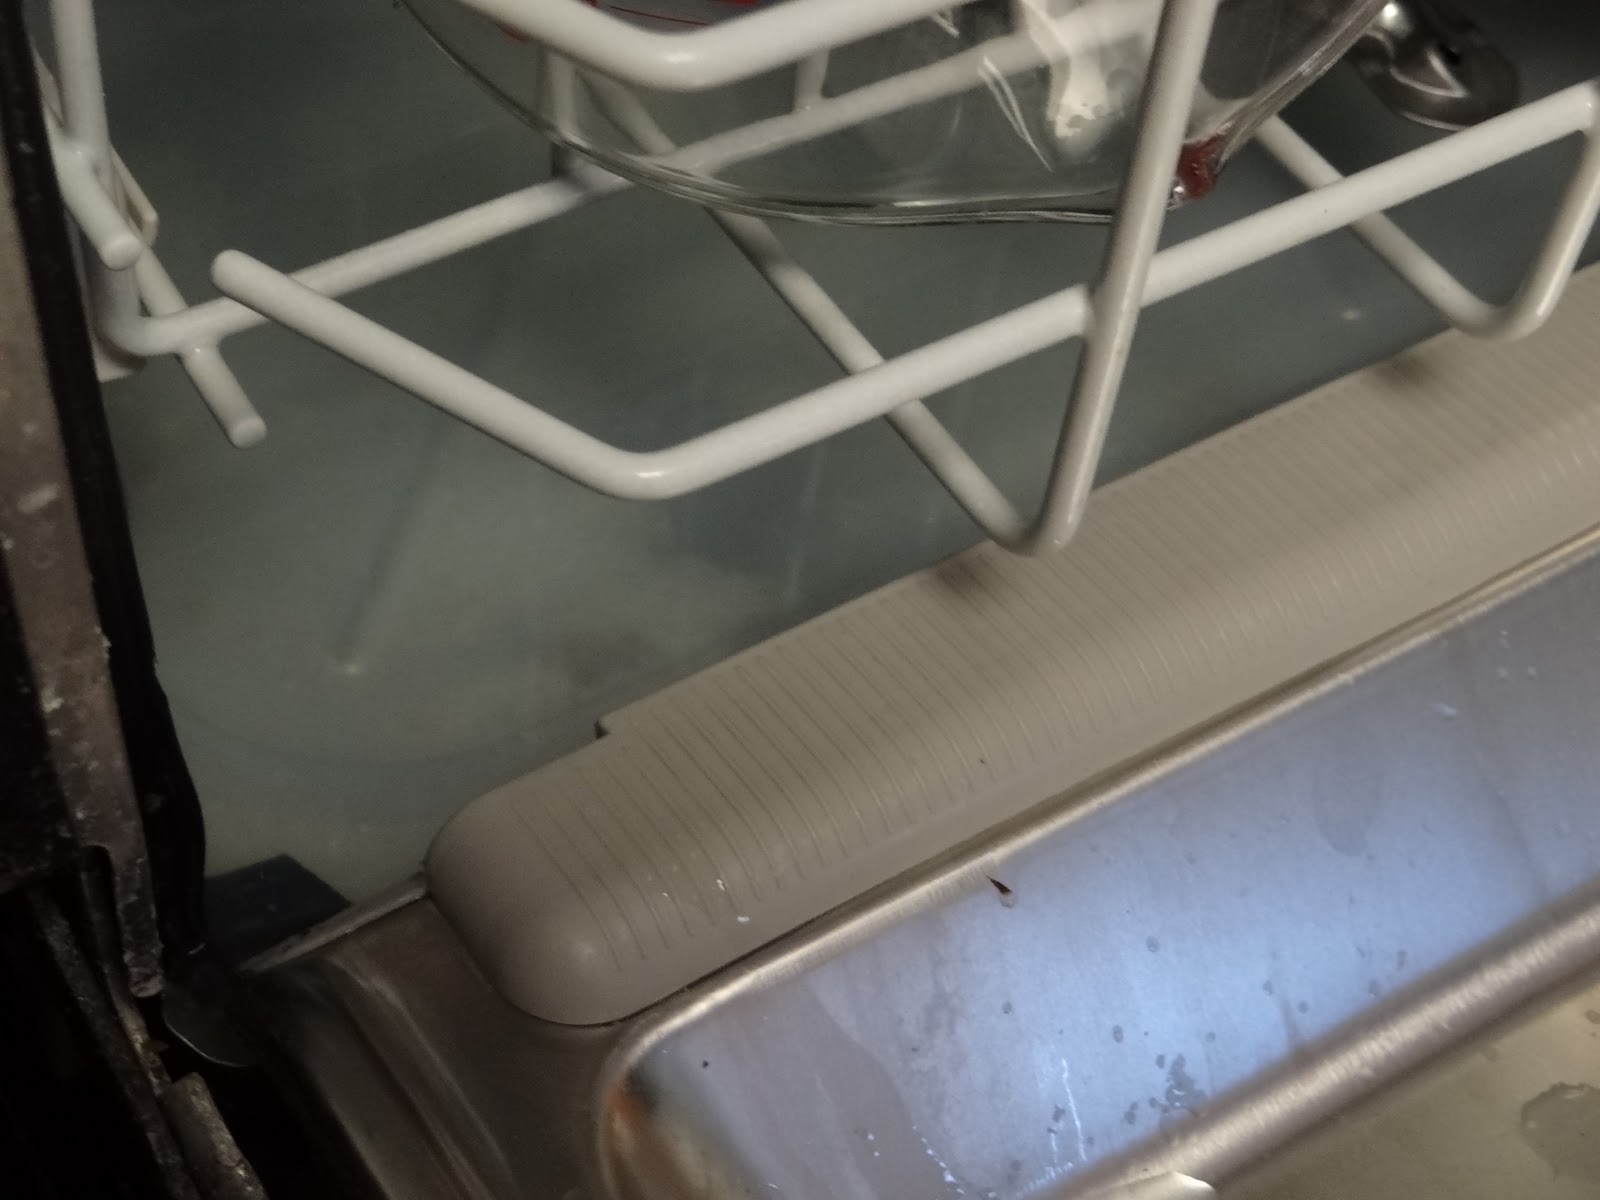
Don't see it?  Let me give you a close up:


Yep, that's about an inch and a half of standing water in the bottom of the dishwasher.  I closed up the lid and went to run the rinse cycle, but there was no power.  D.O.A.  I double checked the outlet to make sure it didn't come unplugged, and even went down to the fuse box to check.  Everything seemed fine, if "fine" means you have a sink full of dirty dishes and a dishwasher with no power.

Erin: "Say Hubs, when did the dishwasher break?"

Hubs: "What do you mean?"

Erin: "You know.  The whole it doesn't run thing.  No power.  Gross standing water.  All that fun stuff."

Hubs:  "I didn't notice."

Super.


Didn't I already fix this guy once? Grr.  So before unpacking, before making myself a late dinner, before throwing in a load of laundry, instead I hopped on the ole' internet machine to diagnose my dishwasher problem.  I went back to applianceblog.com and fixya.com with searches like "No power to Kenmore 665.477...."  It took a little digging, but after awhile it seemed that my problem might be as simple as a dead fuse.  Following the instructions from Fixya (and their incredibly helpful diagram,) I opened the dishwasher panel, took my volt meter and sure thing- power going into the fuse, no power coming back out.

It was only a $22 part, so I ordered it and waited the 5 long days for delivery.  Why do we always host parties whenever the dishwasher breaks?  I asked Jason what the chance was that I had ordered the correct part that would fix this bad boy the first time.  He said 1 in 10 million.  Then he did the dishes by hand, just in case you were wondering.  

When the part finally showed up, it came with really easy instructions on how to replace it, which is something I definitely didn't get the first time around.  This was super helpful, because it's kind of a mess in there.


Ten minutes later, Ry and closed up the beast, plugged it back in and pushed the power button.  We got a shiny green light and the sweet, sweet sound of water draining.  Hallelujah. 

The moral of this little rambling story?  Most of the fixes in your home can be solved with a little bravery and some internet research.  Seriously.  I never would have thought that I could open up, much less diagnose and fix a dishwasher.  But $22 bones later this baby is as good as new, and my beautiful zero radius sink looks like this again.


Yesssss.

October 28, 2011

Baby Steps

Sometimes, it's the little things.  Like when you toss a bunch of stuff in a cabinet when you are unpacking.  All the while, you know it's a mess.  You know you should spend more time putting it away the right way, but all you want is the boxes empty and out of your house.  So you throw things in unorganized and chaotic, and you promise yourself you'll come back in a few days to organize. 

And then six months go by.


This is my baking cupboard.  When I'm not building, fixing or working, I'm pretty crazy about cooking and baking, especially natural and healthy foods for my family.  This cupboard is full of every type of wheat germ, flax seed, etc...

Every time I opened the cupboard I would get anxiety.  I'd promise to organize it the next time I had 5 minutes.  Months went by. And then finally, I did. 

Ahhh sweet organization.  Sometimes, it's the little things.

October 20, 2011

How to Caulk Kitchen Backsplash & Counter Tops

Anyone else have one of those projects that you know you should do, in fact you need to do to prevent any damage to the house, and yet... it just sits out there on the list?  Here's my dirty little secret: after we put in the new glass back splash in the kitchen, we never sealed the space where the backsplash and new granite counter tops met with caulk. (Cue my husband's inappropriate jokes about how my dirty little secret is caulk.  Or lack there of.  Sorry folks, this one isn't for the kids.)


It's not that we didn't know that we had to do it.  Oh, we knew.  In fact, the day we put up the tile I had a tube of clear, silicone caulk all ready to go.  We just needed to wait 24 hours for the mortar to dry, and then 24 hours for the grout to dry, and then, well... we just never got to it.  The caulk moved to the top of the fridge, and then into a cabinet, and even back out to the garage.  We kept saying, "we really need to caulk" (my husband is dying right now) but we just never did.  Months went by.  I'm not proud of it.  But at least you can't call me lazy.  Maybe I just have my priorities mixed up.

So finally, this past weekend, it was time to get the caulk and to to work.  (That's what she said.)  I've had a number of run ins with caulking through past kitchen and bathroom remodels, and I've discovered that it's never as easy to get a clean, crisp line as it looks.  Especially when using silicone caulk.  So I've found a little trick that works for me.  It may be way over doing it.  But I prefer to not have to redo it.


Yep, I tape a line on the counter and on the wall/tile, with just enough space for where I want my caulk to go.  (try... to be... mature....)  Then I can just run a bead of caulk, use the caulk tool to smooth it to a 45 degree angle, and cleanly pull off the tape for a crisp edge on both sides.


And here, just 3 months late, is the finished product:

What's that?  Can't see the caulk?  (hold it in hold it in hold it in)  Well, that's the point.  But at least now no water can get back behind there and ruin our cabinets and walls.  Finally.

By the way- any one else want to weight in on the Playroom Wall Color post?  I am actually pretty shocked, (and incredibly humbled-thank you) by how many of you are reading about our crazy life every day, but only a fraction of a percentage of you weighed in.  Thanks so much to those that did, but you've sort of left us a a tie right now, so we could use a few more opinions if you all would be so kind.  Thanks!

October 18, 2011

#178- 1-2-3 Contact

The other day when I was taking photos for our updated house tour, I realized that this rarely photographed area of our kitchen was in need of some work.


The storage is phenomenal, and I like that the glass cupboards break up all the wood a bit, but it still feels pretty boring.  "Make Glass Cabinets More Interesting" suddenly became #177 on The List.  Can I please stop adding items to The List and finish the ones I have?  Luckily,  I remembered back to a roll of contact paper I bought back when we lived in The Bungalow and somehow made the trip to the new house with us in the "crafts 'n stuff" box.


The color was right, the pattern was interesting, and the most important part- it was free.  So I measured the backs of my cabinets and cut my pieces to size.  The kind folks over at ConTact made things super easy for me by marking a grid and measurements right on the back.  (ConTact in no way paid for my mentions, I'm just a huge fan of dummy-proof design.)


Then I used the squeegee left over from Ry's gear wall art to smooth the contact paper onto the backs of the cabinets.

Leaving me with this:


And once I replaced the shelves and dishes, viola-


Pretty nice little free update, huh?  Unfortunately, with the big windows directly across from this wall, the glare on the glass makes the color a lot less noticeable with the doors shut. 

Perhaps I should line the cookbook shelf too?  Or maybe just cover the cookbooks with fun book covers?

I've still got a little more work to do here, but not bad for a 10 minute, free upgrade.
Before

After
I'm not a fan of the big black microwave, or any of the black appliances in this room for that matter, but they are all high end, and relatively new, so it would be hard for me to justify trading them all out for stainless, especially when we wouldn't be able to afford the high end features that these ones currently have. Not with all the projects we still have left on the list.  So for now, the appliances stay.  But at least my little pop of apple green color gives this side of the room some interest.