Showing posts with label Guest Bedroom. Show all posts

May 25, 2011

#58- We All Live in a Yellow...


Perhaps its the springtime, which has FINALLY come after a punishingly long winter this year, or the pops of color that seem to decorate all my favorite stores, but I've been yellow inspired lately. Our Guest Bedroom reaping the rewards, as you can see in this throw pillow post and this memo board post. So the next step was to find some beautiful, modern, patterned curtains to brighten up the space. Surprisingly, they are incredibly difficult to find in my favorite home decor stores though, so I found myself searching local fabric stores to make my own. Strike 2. At least at the national chain fabric stores in my area, as well as my fav discount fabric warehouse Mill End, there is no geometric, bright yellow patterns to be found. Boo. Thank the Lord for online fabric stores such as Fabric.com which had all of these beauties to choose from:


Really, I could win with any of these, but I especially love DU-790 and DU-217. (UR-988 is by far my favorite pattern, but I wish the beige was more white to work with the white duvet and trim.) All of these fabrics have about a $10-$15/yard price tag though (plus shipping), which is a little steep considering I'll need just short of 6 yards. So as I pondered my options, I stopped into Target one day, and passed this little bad boy on the end cap:


No, it's not a curtain, it's a 60" x 84" tablecloth, but all I saw was a 2 1/3 yard piece of interior width fabric, for only $9.99. (Which is about $4.30 a yard.) I scored 2 of these guys, plus a matching set of cloth napkins (just in case) for a total of $24.99.

The window in my Guest Bedroom is 7 feet wide, so two 60" panels will be perfect to close completely and still drape nicely in front of them. The 84" tall isn't so perfect however, as I'd really like my curtains to be 94" tall so that they fill the wall and make the windows look bigger. I figured that this busy pattern, all the way floor to ceiling might be a bit much anyway though. A little too much party and not enough polish. So I planned to top them with a crisp white to make them look more stately, sort of like this.


So I took a quick trip back to Mill End, and picked up 3 yards of bright white broadcloth and some more white thread for just $4.87. I know, big spender, right? The fabric was cheap because it was in the remnants section, which really just means that's it's from the end of a bolt, and isn't folded and wrapped nicely. I figured I could just wash and iron the fabric (which you should do before any sewing project anyway.) In retrospect, I'm not sure it was worth the savings, because I ended up spending nearly a full, sucky hour ironing this hot mess:


I was Cinderella, slaving over my hot iron. (That is if Cinderella could also drink a glass of wine and watch American Idol as she worked.) I basically followed the same steps as I did to make the curtains in this post, and got this:


The next step was to trim for length, which I always find so much easier to do as they are hanging. I just pin the hem to the right length, and then iron it with hem tape.


And after a little furniture rearranging and picture hanging, we had this:


What do you think? I'm actually thrilled with the way that the fabric softly drapes, even though these are made of outdoor tablecloths. And now, for the first time, I am realizing the major flaw in this little blog endeavor. I'll no longer be fooling anyone that comes to my house that it is furnished with nice, expensive things. I just flat out told the world that I have tablecloths for curtains. Cheap tablecloths at that. Oh well, small price to pay I guess for the outlet of sharing my triumphs (and more often frustrations) in DIY. You all knew I was a thriftster anyway. Not sure I was fooling anyone. :) We still have a little more accessorizing work to do in this room once those boxes are finally out of the garage and unpacked, but for right now, we'll call it a success!

May 23, 2011

#56- This is the Project that Doesn't End

Let's chop this project up to worse one so far, shall we?  After 4 hours of painting the trim & cabinets in the Laundry Room, the rest of that wretched wing of the house was laughing in my face.  You see, the previous owners had at some point painted all the natural oak wood white.  This is a concept that I'm not at all unfamiliar with, since we did the same thing in the basement of our Bungalow, and have seriously considered it for our Kitchen here at The Lodge.  Unfortunately, the previous owners may not have put their best foot forward in this endeavor, because the result was this:


Windows were painted, and then it looks like closed before they were fully dry, chipping the paint.

Thin layers of paint barely cover the wood in some places

More closing of the windows before the paint dried.

Dents and dings are everywhere


Door paint was just put on in 1 coat, leaving the original wood color still showing through in some areas, as well as drips of thick white paint in other areas. 

In general, it gave the home that, "I'm a Meth user" feel.  Instead of making everything feel crisp and bright white, it felt dirty and dingy.  So Saturday morning I armed myself with a gallon of decorator white door and trim paint, and got after the hallway, Guest Bedroom and Playroom.  I figured it would take about and hour, maybe 2 at most.  Wrong!  Perhaps it was all the cutting in and taping, not to mention all the chiseling, sanding and scraping of the old paint, but this beast of a project just wouldn't end!  Six hours later when the Hubby returned home, I was still at it. (Ryder was my little helper throughout the day, so we did have to take a lot of breaks for toy fixing, potty time and dance parties.)

The sad part is that since I was just painting the trim and not the entire rooms, the change was really minimal, and all my hard work didn't seem to make that big of an impression.  Don't get me wrong, I'm really glad I took the time, because it seriously took the home from Foreclosure to Home Ownership, it was just a whole lot of work for just the icing on the cake so to speak. 

Here's a few of those "Not quite as impressive as I was hoping" shots to prove my point:

Hallway

Guest Bedroom

Playroom

Better?  Yes.  Dramatic change to the home?  Not so much.  It certainly makes the Cappuccino White in the hallway pop, and the makes the gray in the Guest Bedroom nice and crisp.  Which means I can't wait to get started with the new color in the playroom, which you can see by the photo above that I'm still working with samples.   Cars on the road between The Lodge and Home Depot watch out, I'm coming through!

May 19, 2011

#60 Part 3- Steal My Sunshine

Check out this curvy little beauty:


She's gorgeous! Trust me on this one, she is. If you don't believe me, take a look at this little number:


Yep, that tiny little price is just $3.00. That, plus a dollar discount at the register made this foxy little piece mine for just $2.00. Practically stealing! You see, I made a trip to our local donation/resale store to drop off a bunch of items that we won't need now that we're in the new house. In the process, I couldn't help but swing though with Ry to the lamp aisle, just to see if they had anything. And once I laid eyes on this looker, there was no way I could leave her behind. (You think I'm crazy, but wait for it...)

After that, we made a quick stop to my big box home improvement store for a little Rust-Oleum Spray Paint in Sun Yellow. Once home, I hung a painting drop cloth on the wall and floor in our new work room in the garage, (Yippeeeee!) lifted the garage doors for maximum ventilation, and went to work.


I like to keep it real for you guys on this blog, so I'll tell you now that I don't have a great track record with spray paint, mostly because I want it done NOW, and I don't take the time to do multiple, thin coats. I forced myself this time around to be more patient however, so I sprayed on a light first coat, and then headed back into the house to play with Ry for a bit. After about and hour, I went back out to apply another thin quote, which looked pretty darn good. I was feeling like quite the professional at this point, though, so I waited another hour and applied one last coat, just for fun. (Yep, it is fun for me. I'm sick like that.)


For the shade, I was lucky before the move to save a lamp shade from my Hubby's trash-throwing clutches. We have a little game we play at our house- The Hubs hates all things clutter, and frequently goes on fits of trashing things he deems as unused or unnecessary. I on the other-hand love to save items, and frequently reuse or re-purpose them as our needs change. Like a bamboo window shade that we removed from the study, and I rescued from The Trash Man only to reuse nailed to the wall as the headboard for our Guest Bedroom in The Bungalow:

Free Headboard = Good

While I really do appreciate Jason's minimalism, to me it makes perfect sense to keep some things around on the chance that we can use them again, rather than trash an item and have to spend money to buy something new later. Jason is a master Trash Man though, so it's not at all unusual to witness a scene at our house where he is heading to the garbage with a home decor item while I chase after him listing all the things I can do with it. Never was this instinct worse than during the move, when any helpless decor item could be on the chopping block at any moment. I was constantly pleading with the court for leniency and to spare their life. It was exhausting, and hilarious.

This little beauty made the cut though, and I'm glad she did, because here she is on top of our beautiful new lamp for the Guest Bedroom:


What do you think? Totally worth the $2 and a $3 can of spray paint, no? I'm super excited to put it all together. More on that shortly. What about you guys? Any spray paint treasures lately? Do tell! Does anyone else live with a minimalist, and constantly have to fight for the rights of good decor?

May 17, 2011

#55- Duck, Duck Grey Duck

Do you Duck Duck Gray Duck or Duck Duck Goose?  Up here in Minnesota we Gray Duck.  And proud of it.  It's like Ice Fishing, nobody else in the country thinks its a good idea, but it's one of those crazy quirks that makes us unique.

But I digress. It didn't take long.  Those minty green walls in the Guest Bedroom started to get to me pretty quickly.  Maybe it was the terrible color, or perhaps it was the beautiful print from my father-in-law and the fun yellow memo board just waiting to be framed on a gorgeous gray wall, but we needed to make a change and fast.


We happened to be at a different home improvement store than usual, so we shook up our usual paint brand choice and got a gallon of Dutch Boy Dimensions paint + primer hoping to achieve 1 quick, clean coat.  After many years of painting we've learned that spending $7 more on the premium paint could save you the time and money of having to purchase a second gallon for a second coat, which makes it totally worth it.


Our thoughts on Dutch Boy Dimensions?  First of all, LOVE the container.  I mean, I love it in a way that normal people can't understand, because it's really not normal, (or healthy) to love a paint can.  But I did.  The twist of top was key.  The easy handle grip, fabulous.  And the clean pour spout, magical.


Since we already had furniture in this room,  and we certainly aren't professionals, we piled it all in the middle , covered it with old sheets and broke out the rollers. 

This is how we do it- ghetto style.

Well, before the rollers came the cutting in, and my favorite tool:


This little handy paint cup is my best friend.  I love how it helps you keep the brush really clean, which is instrumental when cutting in the sharp lines.  My other favorite tip for cutting in is to get quite a bit of paint on your brush, as this will help you keep a smooth, straight line, and also prevent you from having to go back with a second coat.

The color is Sharkey Gray from Martha Stewart, which I have to admit, scared me a bit as I started, because it gave off a really purple hue.  Maybe it's because it was right next to that minty goodness though.  No turning back now...


How Dutch Boy performed once on the walls was not nearly as impressive as in the can.  Unlike our usual go to paint (Behr Premium Paint + Primer), Dutch Boy went on thick and looked like great coverage, but even after very careful and thorough application, in the end we were left with all sorts of spots that needed another coat.  Pretty disappointing for the 1 coat solution. 

Thank goodness after a few quick touch ups, the color turned out great.  Here she is with the debut of those gray pillow shams and bed skirt and the fun new throw pillow I made:


We are totally loving the calming gray tone, and can't wait to brighten up the space with our pops of yellow color. 

What do you guys think?  Good choice?  Any advice or suggestions on paint brands that work well for you?  We have dozens on gallons to purchase up ahead, and would love to make the right choice the first second time around. 

May 16, 2011

#60 Part 2- I Didn't Get the Memo

Here's a recap on Friday's post twitter style:

Found gorgeous yellow and gray fabric, only $3.14, made throw pillow for Guest Bedroom, have plenty left over to make memo board.


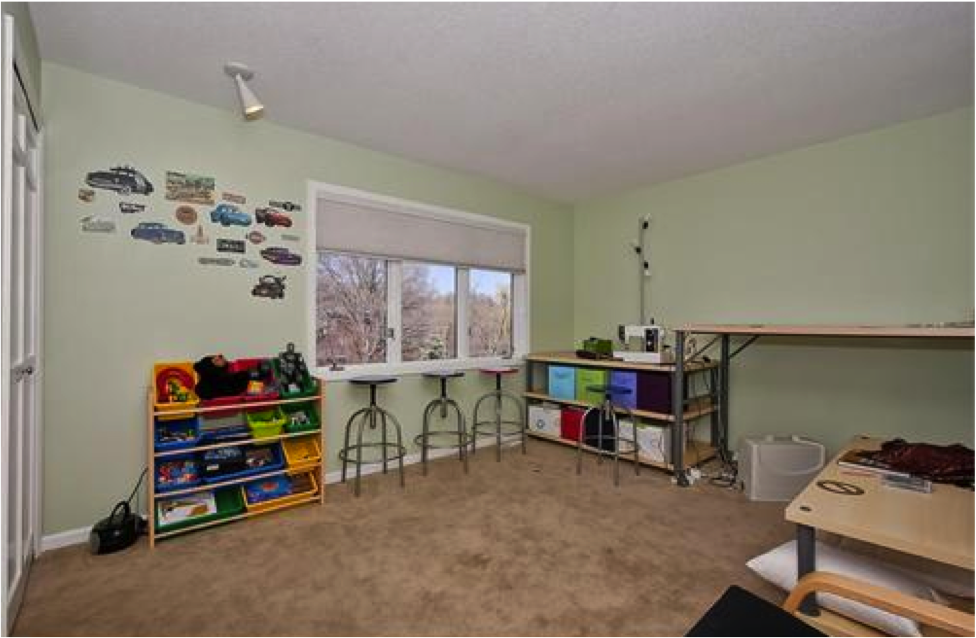
Let me first explain that the reason we are placing a memo board in the Guest Bedroom, is that we are putting our desk in this room.  Why place a desk in the Guest Bedroom when we have other spaces like The Loft?

1. We don't have a lot of furniture, so this piece will help fill the room.
2. Most of our office-style work is actually done on our laptops, anywhere in the house we find comfortable at the time, so an office doesn't really work for how we live.
3. It's much more likely I'll use this desk for sewing or random craft/DIY projects, so having this desk nearby a big, mostly empty closet will be ideal. 

Side Note: The Guest Bedroom is not to be confused with a "Craft Room." (Shudder) Work Room = Bad Ass.  Craft Room = Not So Much.

But I digress, so the desk goes in the Guest Bedroom, and the memo board goes over the desk to place inspiration items, photos, etc...  Here's what we started with:


This used to hang in our back entryway in The Bungalow, and was a great place to display wedding invites, baby announcements, etc...  The cherry wood stain and red patterned fabric aren't going to roll in The Lodge though.  Step 1- Take the board out of the frame, and paint the frame with a coat, make that two, of primer.


While waiting for the paint to dry, Step 2- Remove staples and old fabric from board.

Step 3- Staple new fabric tightly onto memo board.


Step 4- Cut ribbon strips to fit and staple onto board.  I scored 3 yards of white ribbon for just $2.50.


Step 5- Attach buttons to the memo board at each of the ribbon intersections.  I was able to pick up 5 of these, exactly the number I needed, for just 90 cents.  Score.  Here's a sneaky little trick... if you use dental floss as the thread, the buttons will stay on securely and the thread will never break.  And your memo board will smell minty fresh.


Step 6- After a quick light sanding, apply glossy white paint to the frame.  After it dries, place the new memo board back in the frame and viola!


Total cost of this additional project, $3.40 for the ribbon and buttons.  Yes sir, for less than my fav cup of coffee (skim latte with half a shot of caramel), I can now enjoy this lovely memo board for years to come.  I know I said in this post that I could do the Guest Bedroom remodel on the cheap, but I'm starting to get downright cocky now. Just wait until you see what I have in store for the curtains!

May 13, 2011

#60 Part 1- "Well hello there yellow and gray fabric..."

That was me as I ran through JoAnn Fabrics the other day to pick up a zipper for our busted couch cushion.  I was totally minding my business, heading straight for the notions section, and I pass this little lovely on the end cap:


"Wow, and you're 60% off too.  You saucy little minx..."

Now that I have you all thoroughly concerned for my well being that I talk dirty to my fabric, I'll try to maintain my dignity for the rest of this post.  The fabric was exactly what I had in mind for our gray and yellow themed Guest Bedroom, and looks a lot like these beauties from Target that I've had my eyes on.


Not a great photo from Target.com BTW, in reality these pillows are the same color yellow.
Those pillows are $24.99 each though, and even though I admit that this is a good price at a discount store, I still can justify throwing 50 bones at two pillows.  Maybe I'm cheap, but we have a lot of rehab to do in this house, and I can't throw all my cash at decor. 

So I threw the fabric in the cart and ran back to notions for some piping, which they just happened to have in the perfect color.


Of course I totally forgot about the zipper I came in for, but let's focus on the task at hand people. I headed to the check out where my two-thirds of a yard of fabric, on sale for 60% off, and the piping was a whooping $3.17.  Cue mini-celebration dance at register.


Once home I grabbed a spare pillow form from a red throw pillow that was on our old guest bed that I knew we wouldn't use again.  I actually had a lot more fabric than I thought, so I grabbed a memo board and did a little fist-pump when I realized I was going to get both a pillow and a memo board out of my $3.17 fabric.  (More on the memo board later.)


For the pillow all I needed to do was cut my fabric into two equal sized rectangles.   Then I laid out the piping on the "good" side of the first piece, pinning it on tight like so:


Then I placed the other piece on top like a sandwich, "good side" down, and pinned it secure again.  After a quick run through the sewing machine, sewing as close to the piping as possible, I turned it right-side out, and stuffed the pillow form into the 4 inch gap I left at the bottom, and then hand stitched it shut. 


Not bad, eh?  I can't tell if I'm more excited about the great pattern and perfect color match, or the low $3.17 price tag.  Plus I was able to do it all while enjoying a glass of wine one evening after my boys went to bed.  Which sadly, is my idea of a perfect Friday evening these days.  NextI'll give you all the details on the sweet memo board I was able to make to go with it.  Stay tuned...

May 9, 2011

#59- Curl Up and Dye

Before Santa came this past year and left this little beauty of a bedspread from West Elm under the tree: (As seen in The Bungalow)


This is what our bedding looked like: 

This Thomas O'Brian duvet from Target is actually more gray/taupe than tan/khaki, but to match our wall color I cheated the color of the duvet with brown shams and throw pillows to make it work.  It turned it much more "country home" than I would like to admit... oh the shame. 

That's ok, it's time to redeem myself, and give this baby the life Thomas O'Brian intended in my new gray, white and yellow guest bedroom.  Which means those khaki pillow shams and bed skirt are toast.  Or are they?


For the record, I'm not usually "pro-bed-skirt," but the combination of a very old bed frame and an intense desire for under-the-bed storage is making it a necessity at this point.  Don't judge me.  Since I was going to throw/donate these bad boys anyway, I thought I'd first take a chance dying them gray to match the new look.  There is no earthly reason I should have thought that this was a good idea.  I've had many very unsuccessful attempts with dying fabric in the past.  But I theorized that this was likely because I never followed the directions completely.  (What working mom has time for multiple steps?)  So I decided to take one more chance with fabric dying, and vowed to follow each and every step to the T so that I would get a perfect product.  I'll warn you now, this goes very badly.

Here are the tools I was working with, found in the laundry detergent isle in any grocery store.  


Rit dye doesn't come in gray, you are just supposed to use a smaller amount of black dye to achieve it.  (I know this to be true by the way, as I have attempted on a couple of occasions to dye something black, but have never succeeded with anything darker than charcoal gray.)  The instructions suggest to use Rit Color Remover before dying your fabric, so I threw some of that in the cart too.  And since I'm a super-instruction-follower this time around, I read on the box of Color Remover that 2 boxes are actually necessary for the amount of fabric I was using, so I tossed another in the cart.  

Erin- 1  Rit Dye- 0

Once home, I insisted on following the instructions to the letter, so used a food scale to weight my dry fabric so I knew exactly what I was dealing with here.  Both shams and the skirt came out to 2lbs 9oz.  My package of black dye was for a maximum of 2 lbs of fabric, so I decided that this amount was perfect to achieve the gray I was looking for.  I've never successfully been able to dye to a dark black before, so with about 25% more fabric, I guessed that I'd achieve a medium to light gray.   I also checked the material my fabric was made out of- both 100% cotton.  This would be perfect, as poly blends don't dye nearly as well.

Per the instructions, I first put all the fabric through a regular, warm wash cycle, and then ran a second cycle with the color remover. In the end I was left with this yellowy mess.  So far so good.


Erin- 2  Rit Dye- 0

Then it was time for the dye, and again I followed the instructions perfectly, (i.e. added a cup of salt, restarted the agitator on the machine so that it agitated for 30 minutes, etc..) When the cycle was finally done I rushed to the machine to see my beautiful gray creation, and found this:


It was black.  Blackity-black-black.  Bad bachelor pad decor black.  It's one of those cruel tricks of the universe, in 3 previous attempts to dye fabric black I get gray, and when I actually attempt for gray I get black.  Maybe it was all that instruction following...

Rit Dye- 10  Erin-2

Never being one to give up without a fight, I figured that if color remover worked for me the first time, taking just a little color out, it would work again.  This time I only used 1 package though, hoping that it would remove just a little of the black and leave me with gray.  Fail.


It was red.  Come on!  Are you kidding me? Red?  We started with khaki, went to yellow, then to black, now red?

Rit Dye- 20  Erin- 2

By this point I was getting desperate, so I went to the Rit website.  They had all these crazy equations for figuring out the right color, but they also had a link to their color Pearl Grey.  Yep, that's right, little did I know but Rit actually makes a color called Pearl Gray.  The perfect color, no guessing required.  It's just in their extended line, not their basic line sold at grocery stores.  So I headed to my fabric store to pick up a package, as well as 2 more packages of Color Remover to start from scratch.  And in the end, I ended up with this:


Erin 21- Rit Dye 20

It was a close one, but I just barely pulled out a win at the end.  Not to shabby, eh?  And even though it took me a ton a tries and packages of Rit, the total project only cost me just under $15, which is far less than I would have spent purchasing 2 new shams and a bed skirt.  Look at how great it works with the new shaggy throw pillow I found for $8 in the clearance section of West Elm.  All-in-all I'm happy, and I might even attempt to dye another big project down the road now that I have conquered fabric dying and mastered Rit's secrets.  I'm not sure if I have the guts to though, to be continued...

Has anyone else ever successfully dyed anything besides the tie-dye shirts we all did in elementary school?  Even then I remember being so bummed that my shirt was always more of a brown mess then a true tie-dye.  Maybe it just wasn't meant to be for me.


UPDATE: Here's a look at how everything looks put together.  Still in progress- we have a lot to do alright? :)